Making Math
          Visible

Paper Dome


Time Required:  2 hours

Materials:
Notes:
1. This small paper structure (21 inch diameter) is a good pedagogical tool to introduce students to the geometric properties of domes.  It is not very rigid but is an important foundation before making any of the larger, more stable constructions.
2. Students should work in pairs.
3. It is important to use two colors of paper.
4. Students should be familiar with the regular icosahedron.
Part A: Minds-On

This dome has two different lengths of struts and two different types of vertices (five-fold and six-fold).  Students need to develop a clear mental model of the structure in order to fully understand how to assemble the components.  Students will first build a regular icosahedron and divide its faces into smaller triangles in order to have a visual understanding of the parts and their relationships. 


1. Hand out one sheet of triangles per pair of students, along with scissors and tape.  Ask students to cut out twenty triangles and tape them together, five at a vertex, to make a regular icosahedron.  Ensure that the printed black lines are on the outside of the model as in the image above.

2. Review the fact that the icosahedron has 20 faces, 12 vertices, and 30 edges.


3. Ask students to use colored markers (not black) to draw lines that divide each face into four identical equilateral triangles.  It is helpful to start by marking a dot at the midpoint of the edges. 

4. Let students generate questions and explore the structure they have drawn.  They should discover that there are 80 small triangles.  At the twelve original icosahedron vertices, the small triangles meet in sets of five.  Thirty new vertices have been created (at midpoints of the original edges) at which the triangles meet in sets of six.  Point out that the 6-way vertices are slightly closer to the center of the object than the 5-way vertices.

5. Continuing, notice that the colored edges (blue in the image above) always go from a 6-fold vertex to another 6-fold vertex.  In contrast, the black edges of the small triangles (each half of an original icosahedron edge) always connect a 6-fold with a 5-fold vertex.  This is important because although these black and colored edges are the same length, there will be two types of edge, of different lengths, in the next model.


6.  Most geodesic domes are designed to have all the vertices the same distance from the center.  This can be achieved if we imagine moving the 5-way vertices slightly towards the center.  As a consequence of this transformation, the black edges will become slightly shorter than the blue edges.

7. Turn student's attention to the fact that a series of ten colored edges form an "equator" dividing the model in half.  (In fact there are six different ways to do this.  Why six?  Because you can choose two opposite vertices to be a "north pole" and "south pole" in six different ways, since there are twelve vertices.)  Students will understand that a hemispherical dome can be built by eliminating everything on one side of the equator.

8. Ask students to visualize one hemisphere and count how many of the longer colored edges and how many of the shorter black edges are required to build the dome. (Answer: 35 of the longer colored edges and 30 of the shorter black edges.)  In the next part, we will curve these straight lines slightly to make a true hemisphere.

Part B: Hands-On

1.  Hand out the printed colored paper to pairs of students and ask them to cut out the curved bands on the solid lines.  (Do not cut on the dotted lines.)   Each group needs 35 of the longer (darker colored) bands and 30 of the shorter (lighter colored) bands.  These components will be the "struts" making up a hemispherical dome as in the picture at the top of this page.


2. Instruct students to use a ruler to make a neat crisp fold on the dotted lines.


3. It is important that all the pieces be folded consistently.  As shown in the image above, when curved like a rainbow arc, the right end is folded up and the left end is folded down.  (Note the interesting optical illusion in the above image: The darker piece is actually longer, thought it appears shorter!)


4. Ask students to connect five of the shorter, lighter struts by gluing the tab of one to the body of the next, in a cycle.  Align the pieces so the fold lines come together.  Students will discover that working in pairs makes this easier.  (Never glue a tab to a tab.)


5. Students can now add five of the longer, darker struts to make a pentagon around the first five struts.  There will be five remaining tabs on the outside of the pentagon.  This is a "pentagon module".

6. Ask students to make a total of six pentagon modules.  There will be one for the "north pole" and five around it.  There will be five remaining long (darker) struts.


6. Ask students to connect two pentagon modules using one tab from each.  This makes one of the 6-way vertices. 


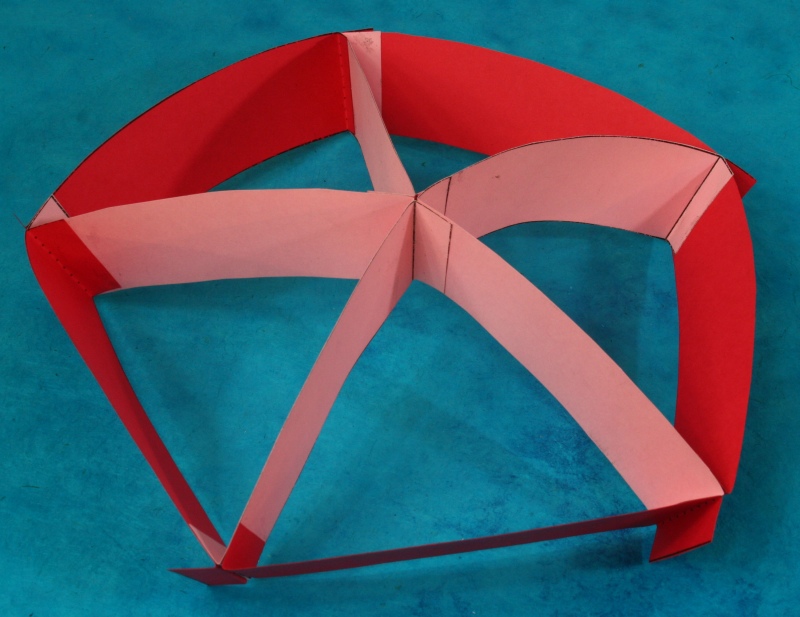
7. Students should puzzle out how to connect the modules.  The five remaining struts are used to complete the equator.


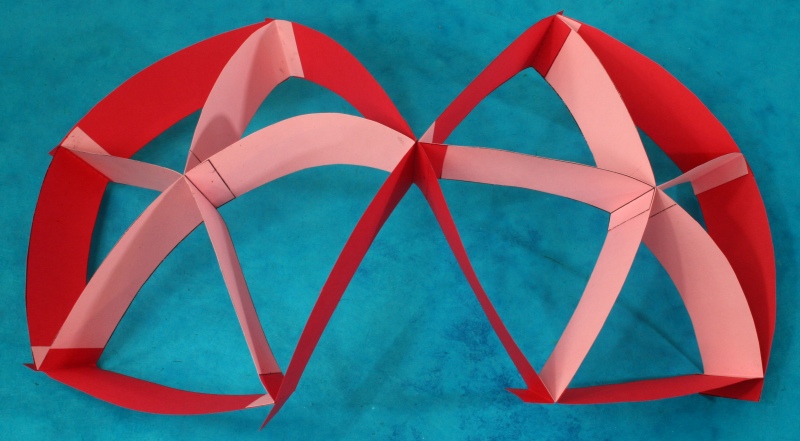
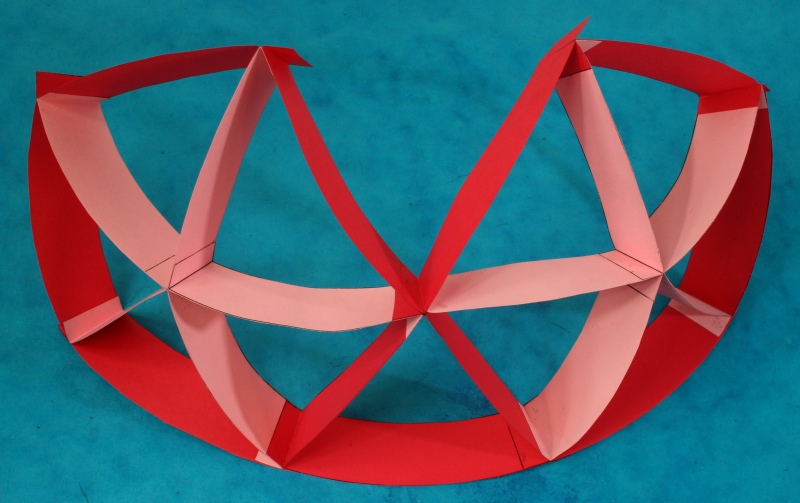
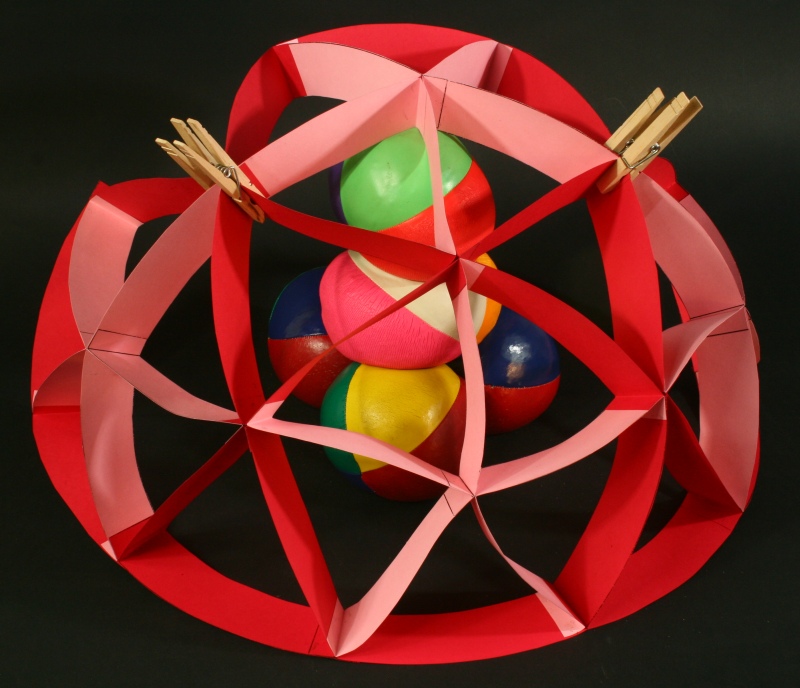
8. It may be useful to improvise a support to hold the shape while the glue dries.  Clothes pins or other clamps may also help.


Part C. Conclusion

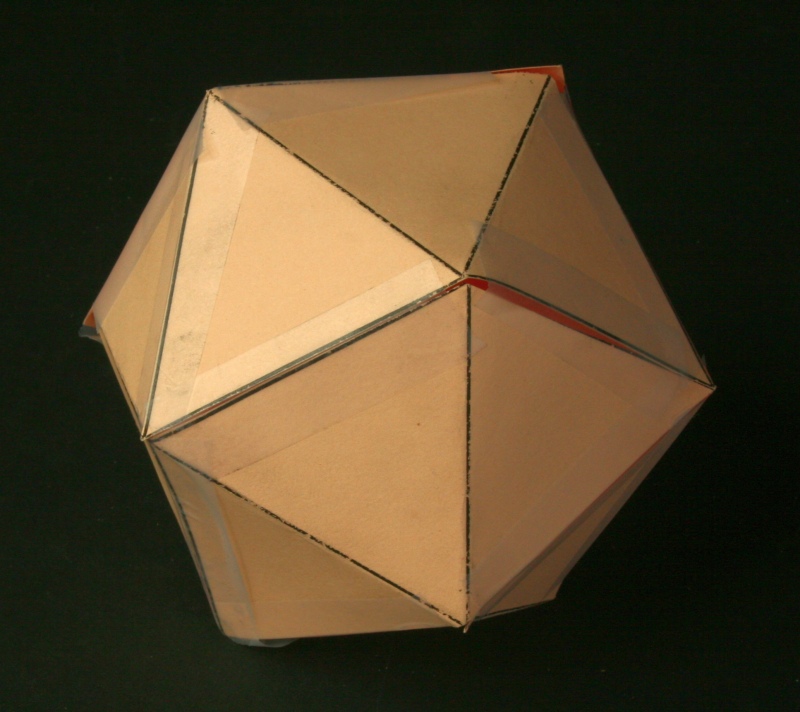
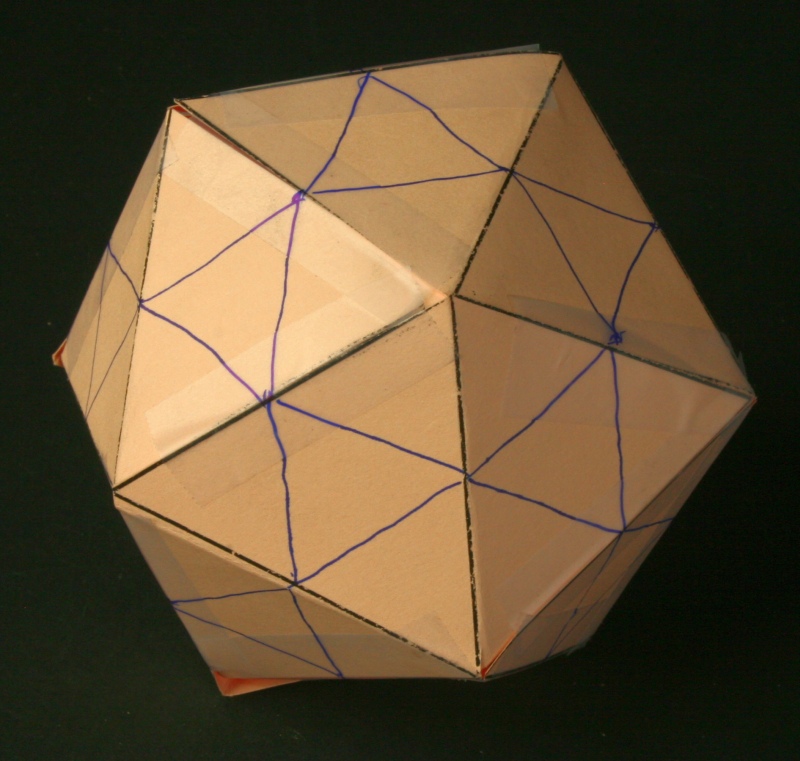
Ask students to compare their paper dome with their marked icosahedron and observe the analogous structures.  (This provides another example of an isomorphism, as introduced in the 12-Card Star workshop.)

Students are now ready to replicate this structure using other materials at a variety of scales.


Possible Extensions

1.  Build a similar dome in other materials, e.g., straws for struts with pipe cleaners inserted for connectors, or Zometool.

2. Make a complete sphere.  How many of each length strut are required?

3. The design on this page is called a "frequency 2 icosahedron" because the original icosahedron edge is divided by two.  See if you can design a frequency 3 or 4 icosahedral dome.  There will be more strut lengths required.  How many of each type?