Making Math
          Visible

Summer

Geometric Sculpture IV


Summer is a geometric sculpture which students assemble from sixty identical laser-cut wood components.  Cable ties are used to connect the parts together.  The construction activity is a fun group exercise in spatial reasoning which makes clear how mathematics can be applied to art, architecture, and design.  The result is a beautiful 24-inch diameter orb that can be displayed in a school or classroom to help make math visible to students and the community. It will serve as a focal point that sparks mathematical conversations.

We have colored the example above with turquoise stain (intense on the outside and light on the inside) but students may prefer to try their own creative coloring ideas

Time Required:  1+ hour for Assembly (not including cutting and optional staining)

Materials:
Notes:
1. This is the last (and trickiest) of four related geometric sculpture activities.  For an introduction to the materials and concepts, students should first do the others.
2. 180 ties are needed for the design, but have extras available because some mistakes will be made, which need to be clipped and discarded.
3. Our example, illustrated above, is stained turquoise on the outside and a light turquoise on the inside.  Other colors, a solid color, or no coloring are all options.  We also chose to leave the outer cable ties untrimmed for an organic feeling, but feel free to clip yours.
4. We don't advise scaling this design to be any smaller, because it would be difficult for hands to fit through the openings and work inside.
Part A: Preparation

1. Laser-cut the parts.  Smoke marks can be minimized by applying tape to the bottom surface before cutting or the surfaces can be lightly sanded afterward.  A quick light pass on both sides with an orbital sander (150 grit) removes smoke marks, gives the parts a smooth tactile surface, and prepares them for staining.


2. The edges at both ends need to be beveled as indicated (in degrees) in the above drawing.  At both ends, remove material from the back (the inside) surface. Only a small amount of material needs to be removed.  It is sufficient to sand down to half the thickness of the wood, as illustrated above.


3. It is not crucial to bevel the center prong and it is somewhat tricky to do, because the proper angle is very flat.  If you do bevel it, be sure to remove material from the front (the outside), not the back.  You would need to tilt the table on your sander past 45 degrees to 64 degrees and few sanders allow for that much travel, but you can approximate the angle many ways, which we leave to you to devise.  Or you can simply omit beveling the prong, which makes the first connection below somewhat hinge-like, but the proper angle finds itself by the time all the parts are connected.


4. Optionally, the parts can be stained.  Brush on a water-based stain with a foam brush and wipe off the excess with a paper towel.  Let dry.  Using different colors on the front and back makes it easier for viewers to apprehend the finished structure and helps prevent many mistakes in the assembly.


Part B: Hands-On

1.  Remind students about safety when using cable ties: Cable ties should only be used for the construction and can be dangerous if placed around any part of the body. (See the previous geometric sculpture activities for additional cable tie instructions.)

2.  Organize students in groups of two or three.  Hand out three pieces to each group.
 
3. In order to familiarize students with the parts, discuss the following observations:  All the parts are identical.  There are six connection points in each piece, where a cable tie will be used to connect it to another piece. The connection points at the five straight edges (which includes the central prong) each have a single hole, but the interior connection point has a double hole. 


4. Explain that we will initially make a module of three pieces with three-fold rotational symmetry using the prong and the interior double hole.  Ask students to figure out what it might be.  (They may also discover that 3-fold structures can be made by connecting the parts in other ways, but we want to begin by using the prongs.)  When they have a solution, they can hold their three pieces together in position and compare it to the rest of the class.  Point out groups with the correct arrangement.  The correct assembly is shown above, both from the outside and the inside.  Note that the three prongs are hidden on the inside

5. When each group has the parts positioned properly, hand them three cable ties so they can connect the parts.  Explain that for the box at the end of the cable tie to be hidden, they should begin on the inside (the lighter color here) which will be more hidden in the final result.  A gentle tug while wiggling the tail will snug up the connection.

6. Check each module to ensure the parts are properly joined and the ties are tight.  You can snip off the tails with the wire cutter as a mark of which modules you have checked.


7.  Depending on the time available and the maturity of the class, you might want to give step-by-step assembly instructions or let them puzzle out how the parts go together.  The 
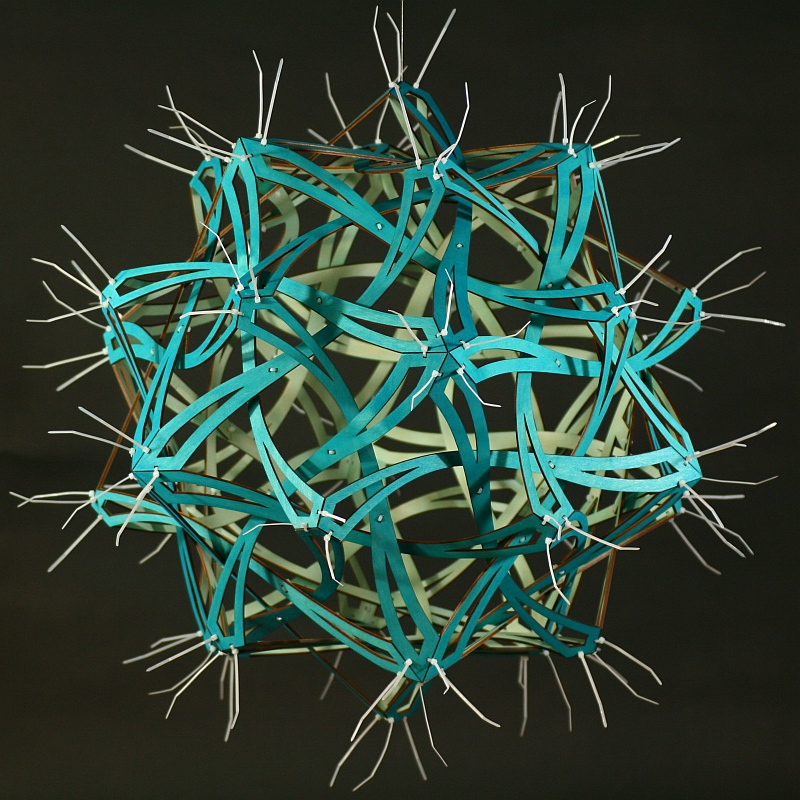
general instruction is that the twenty modules assemble like the twenty faces of an icosahedron, with the pointy corners serving as the vertices of the triangles.  If giving detailed 
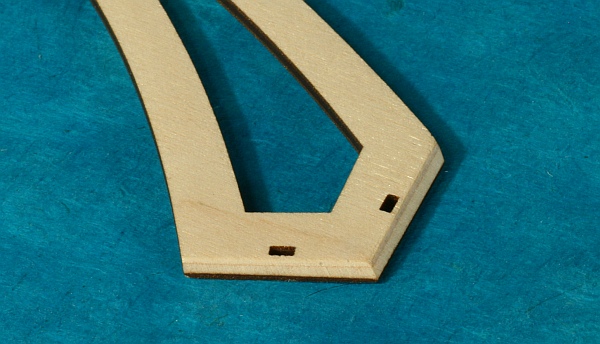
instructions, first point out that whenever two modules join, two cable ties are needed to make the connection, as shown above.   Note that we are letting these cable tie tails stick out, so unlike the other sculptures in this series, we are not starting these at the back. 


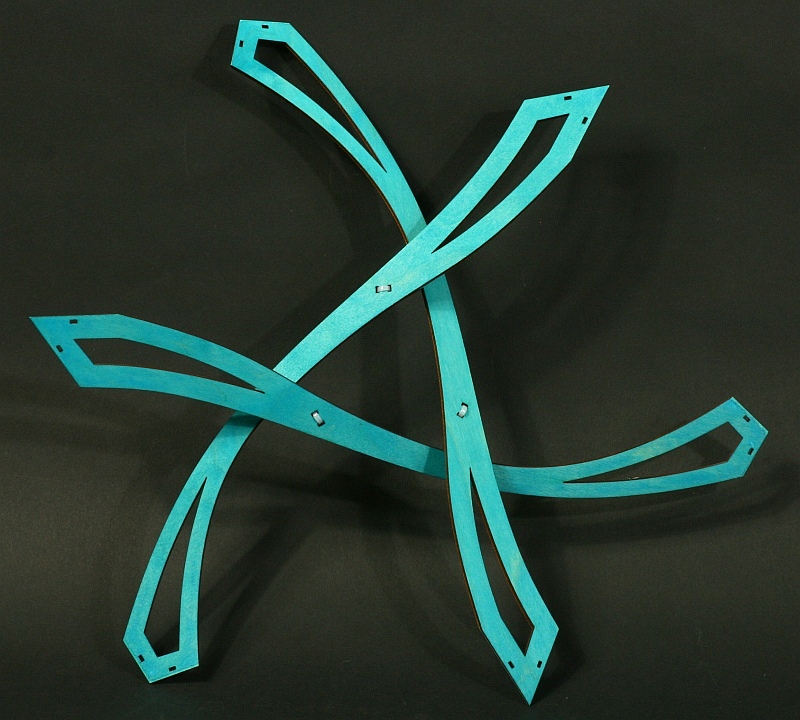
8. If giving step-by-step instructions, the next stage is to join five into a cycle around one 5-fold vertex, as shown above.  If you think of the twenty modules as analogous to the faces of a regular icosahedron, this corresponds to five triangles making a pentagonal pyramid around one vertex.  It is OK to have the class work in two groups and make two of these five-module structures. Put one of the two aside for the last step below and continue working on the other one in the following two steps.


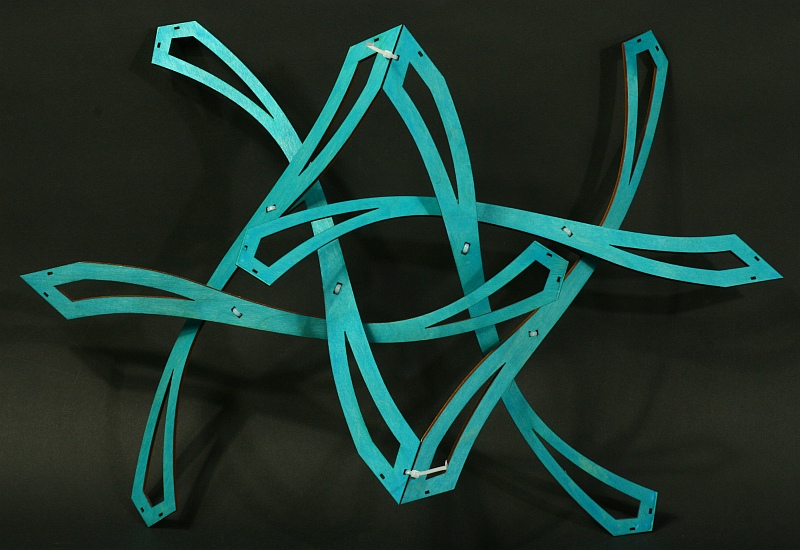
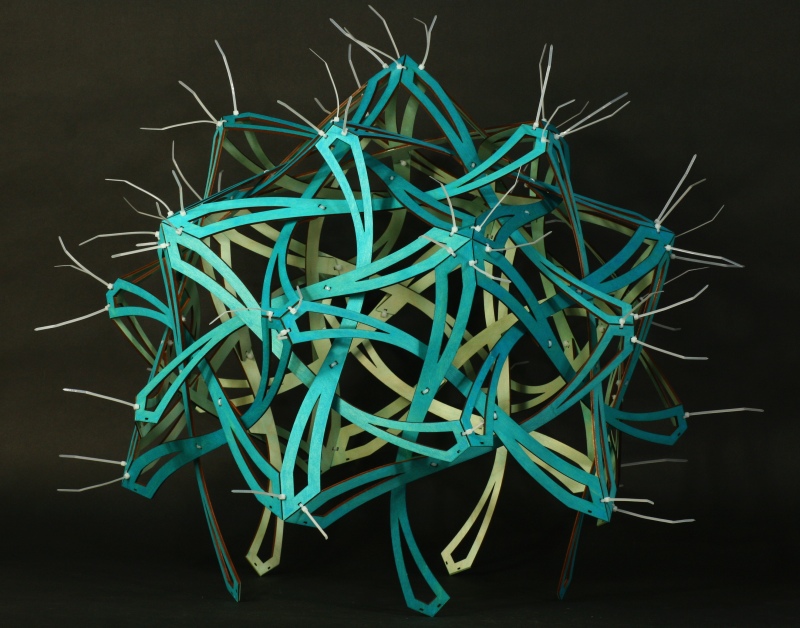
9. At this stage, we have added five more modules around one of the groups of five.  This view is from the side, with the original 5-fold vertex now at the top.  The new five can be added in parallel, with five groups of students working at once on all sides.


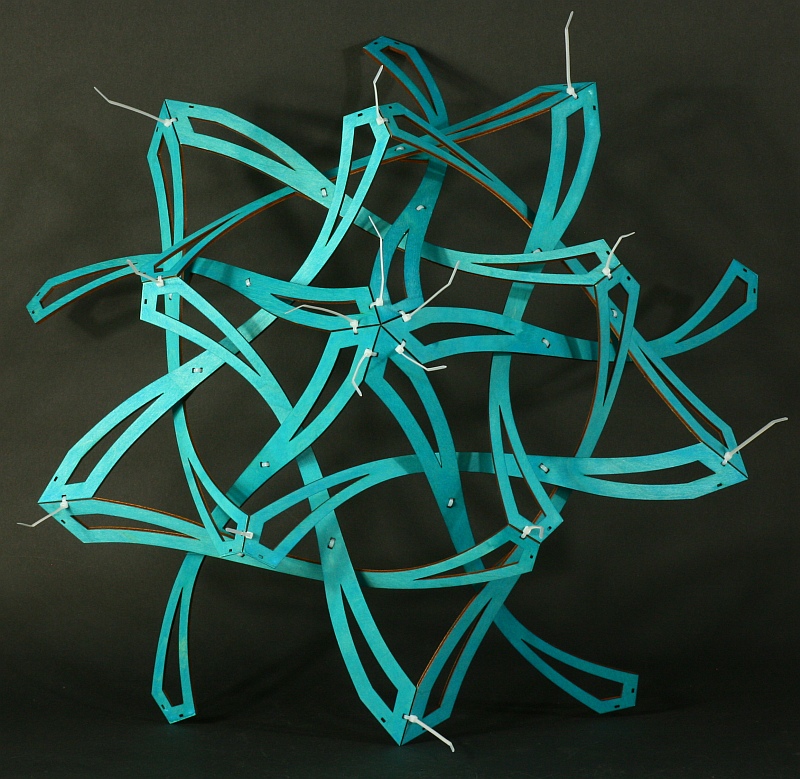
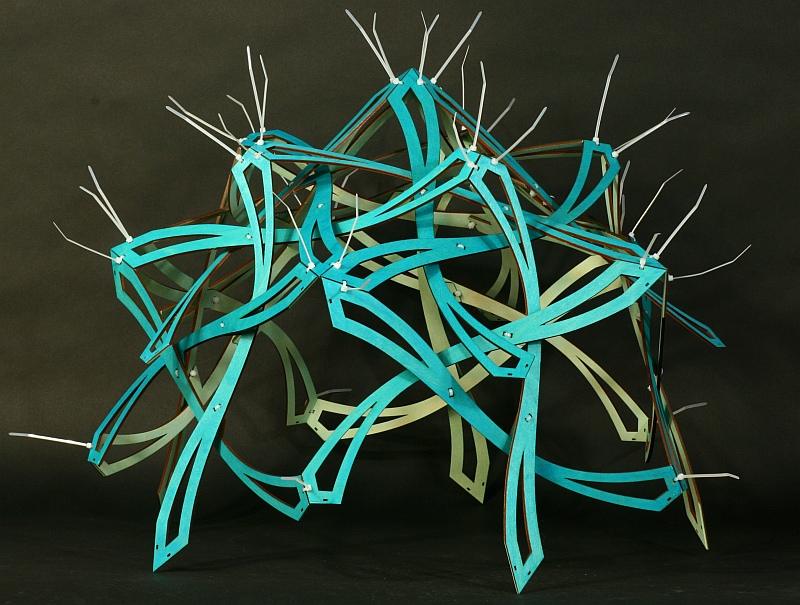
10. Here, another five modules have been connected, so everything but the bottom cap of five is complete.  Again these five can be added in parallel.


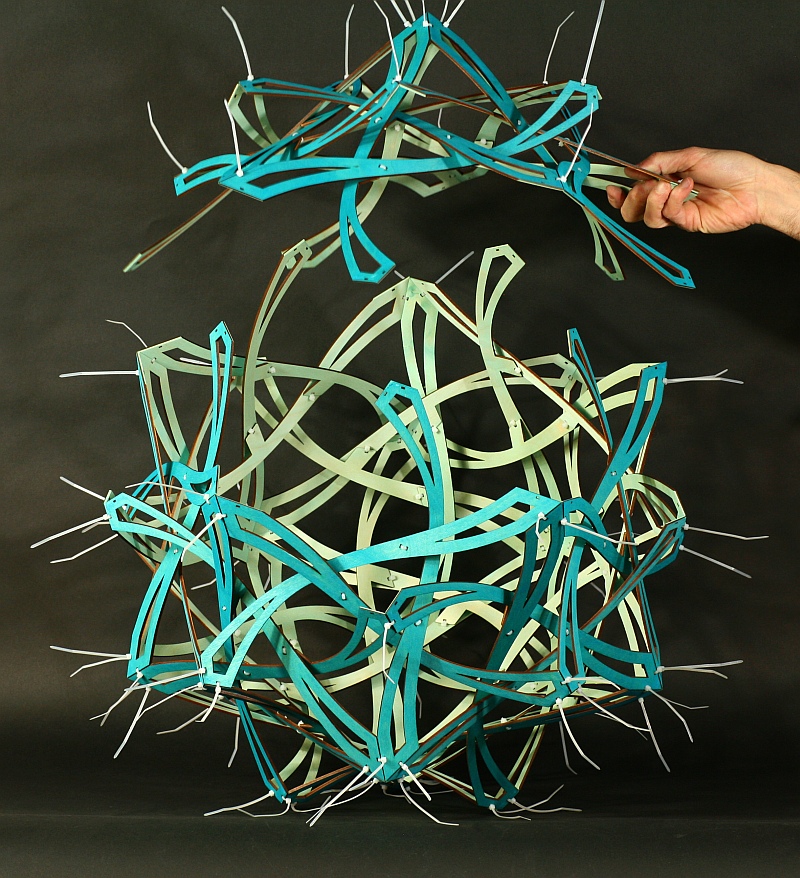
11. At this stage, we turn it over and the remaining cycle of five can be added like a hat.


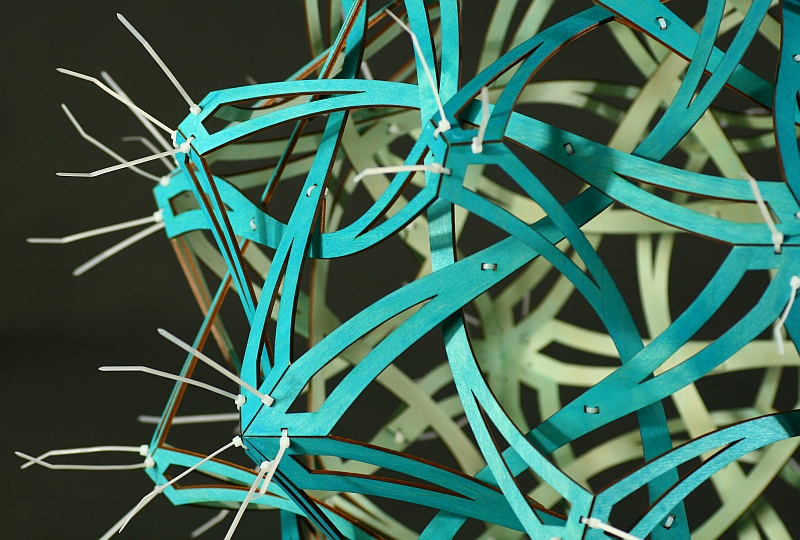
12.  When complete, check that all the connections are correct and all the cable ties are tight.  You might notice in this closeup view that we inserted all the ties in a consistent manner, so they spiral in the same way around each vertex, but this is a fine point not to worry about the first time doing this assembly.

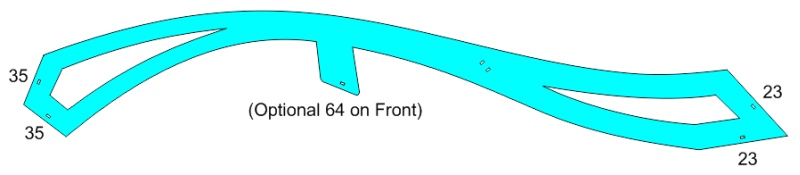
13. Along the way, students should be able to determine that 180 cable ties are required, since each part has six connection points.


Part C. Conclusion

1. Students should locate the 2-fold, 3-fold, and 5-fold axes and see that the sculpture has the same rotational symmetry as a regular icosahedron or dodecahedron.  Note that the 2-fold axes pass through openings that are four-sided, but careful examination shows them to have 2-fold, not 4-fold, symmetry.

2. If students sight along the planes to look for co-planar pieces, they should observe that there are none.  Each piece lies in its own plane, so the sixty parts lie in sixty different planes.


Possible Extensions

A.  Try all four sculpture activities.

B.  Try the Symmetry Search game described here.

C. With some trigonometry, you can calculate what the bevel angle should be, if you start by measuring the angle at the tip of the part.


Note: The original sculpture of this design is a larger version called Anemone, installed at the Maritime Explorium in Port Jefferson, NY.  We have adapted it for this Making Math Visible activity.