
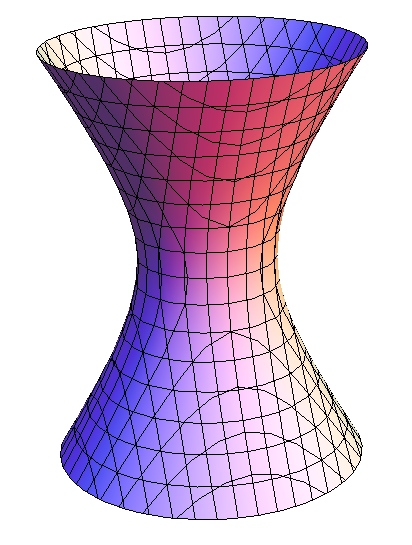
Hyperboloid


4. Ask
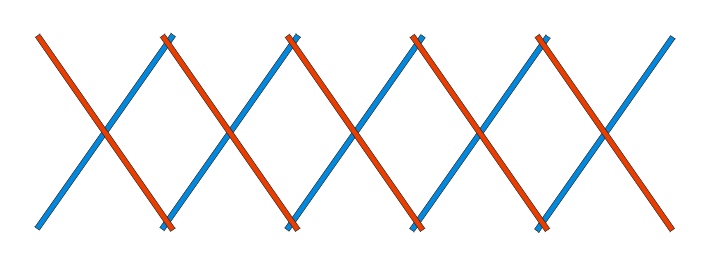
students to draw the pattern using two different colors being
careful to indicate how one family of sticks is always behind
the other family of sticks. Ensure each stick crosses
three other sticks, with one crossing at the midpoint and one
near each end. Point out how the pattern can be seen as a
series of overlapping X's.
Part B.
Individual Constructions
1.
Pair up students into teams of two. Hand out 24 skewers
for each pair. Place small piles of rubber bands on each
table.
2. Ask
students to position some of their skewers to represent the
pattern they have drawn. Students should check that one family of sticks is always
behind the other family of sticks.

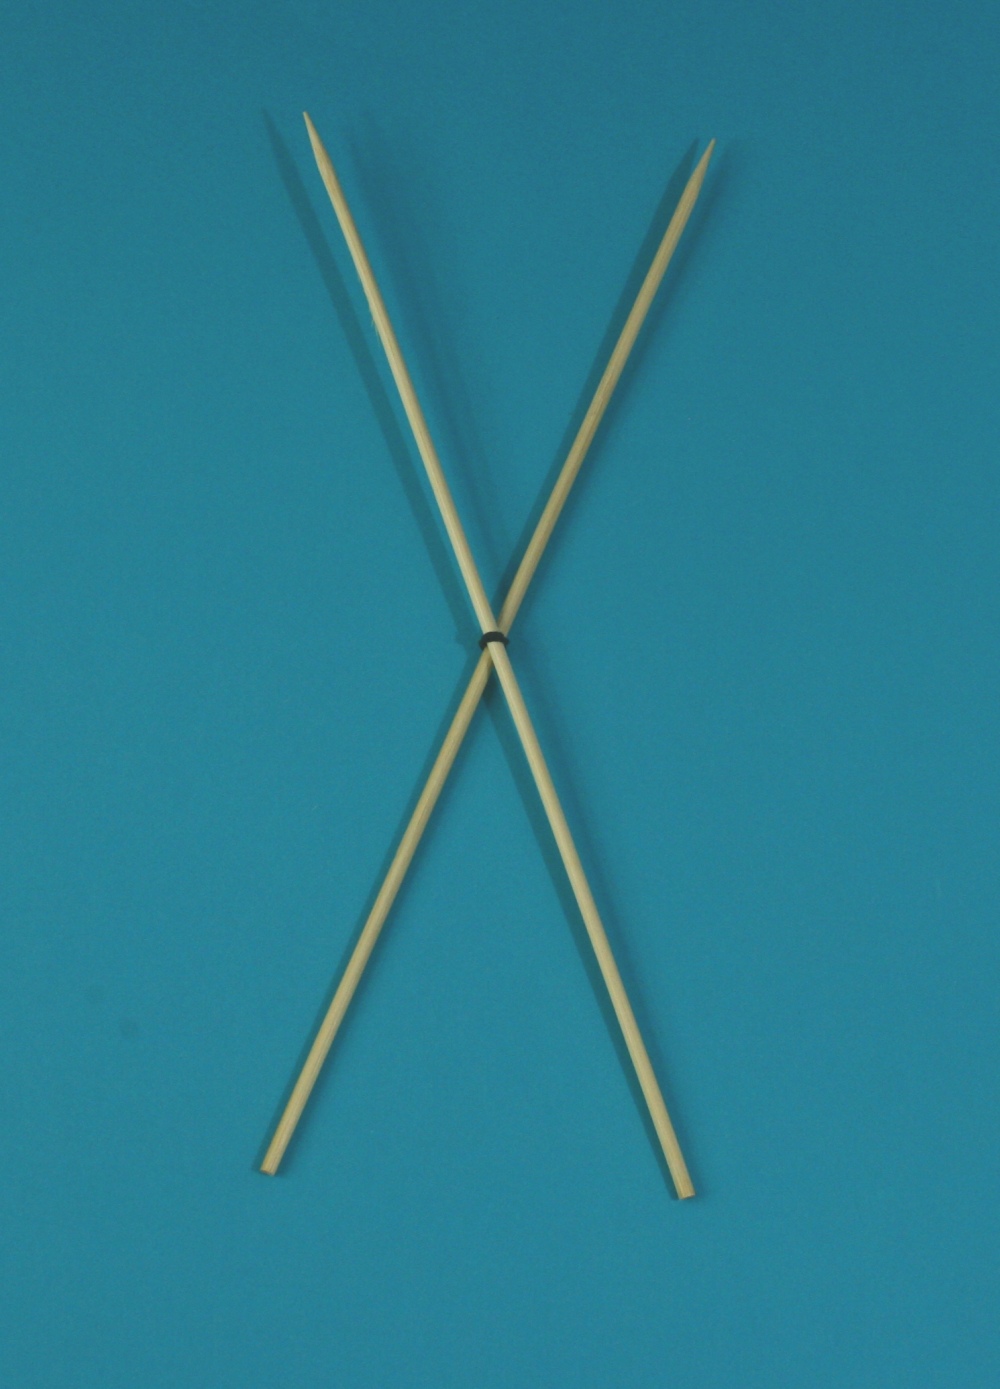
3. Show
students how to take two skewers and wrap a rubber band around
them three times. Slide the rubber band to the middle of
the skewers and open the pair up to make an X. Demonstrate with a scissoring
motion that you can switch from one way of slanting to the other
way of slanting.
4. Ask a volunteer to come to the front of the class and make
another X.
5. Ensure
both X's look identical. Their slants must go the same
way. Scissor one if necessary if they do not initially
match.
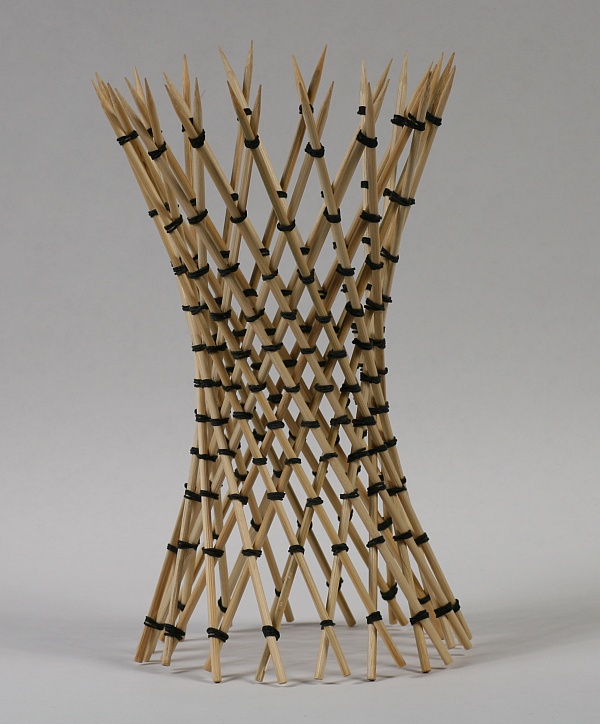
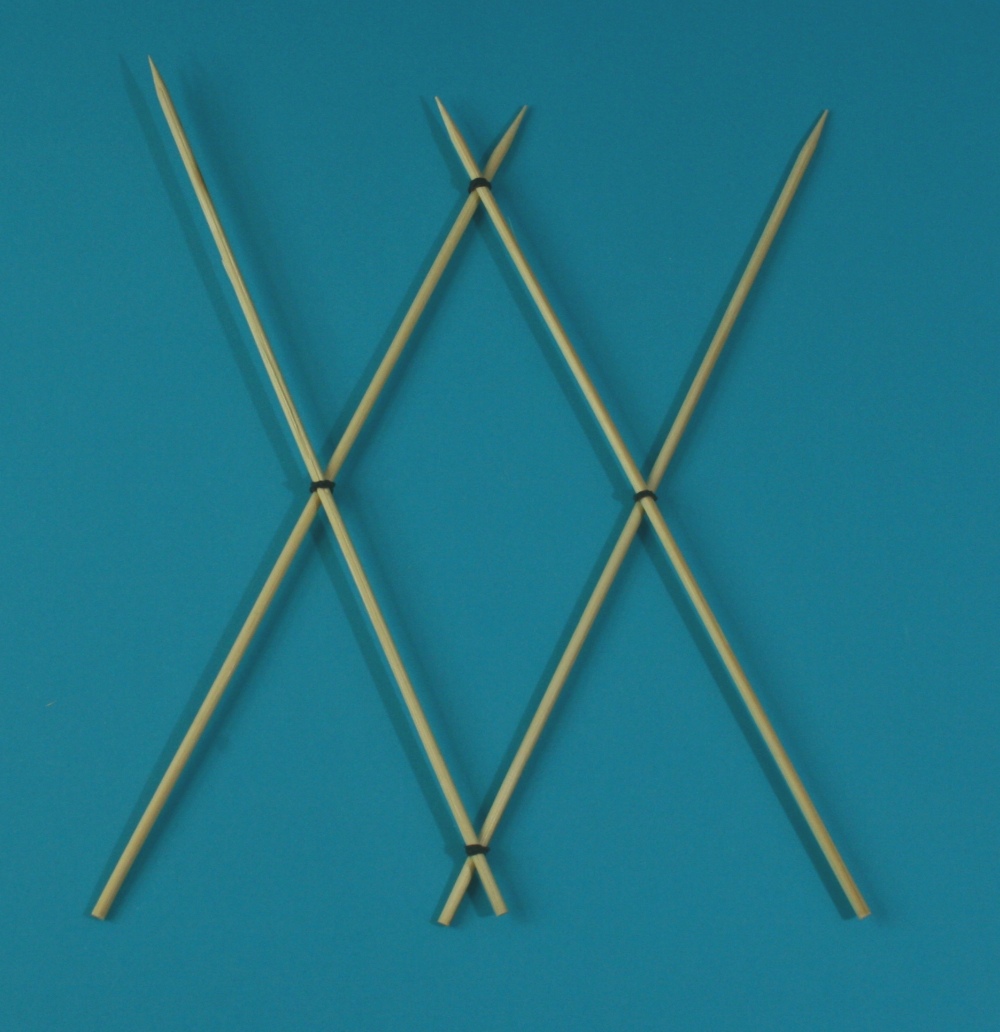
6. Ask the volunteer to hold both X's beside each other with the ends overlapping as in their drawing. Point out that the tips might be in front or behind, but only one way gives the consistent pattern we are looking for. Wrap a rubber band (three times) around the top crossing. Wrap another around the bottom crossing. At this stage you should have a double X as in this image:
7. Tell students to work in pairs to make their own double
X's. Check the crossing on each for consistency.
Recommend that the rubber bands be placed an inch or more from
the ends so they do not easily pop off.
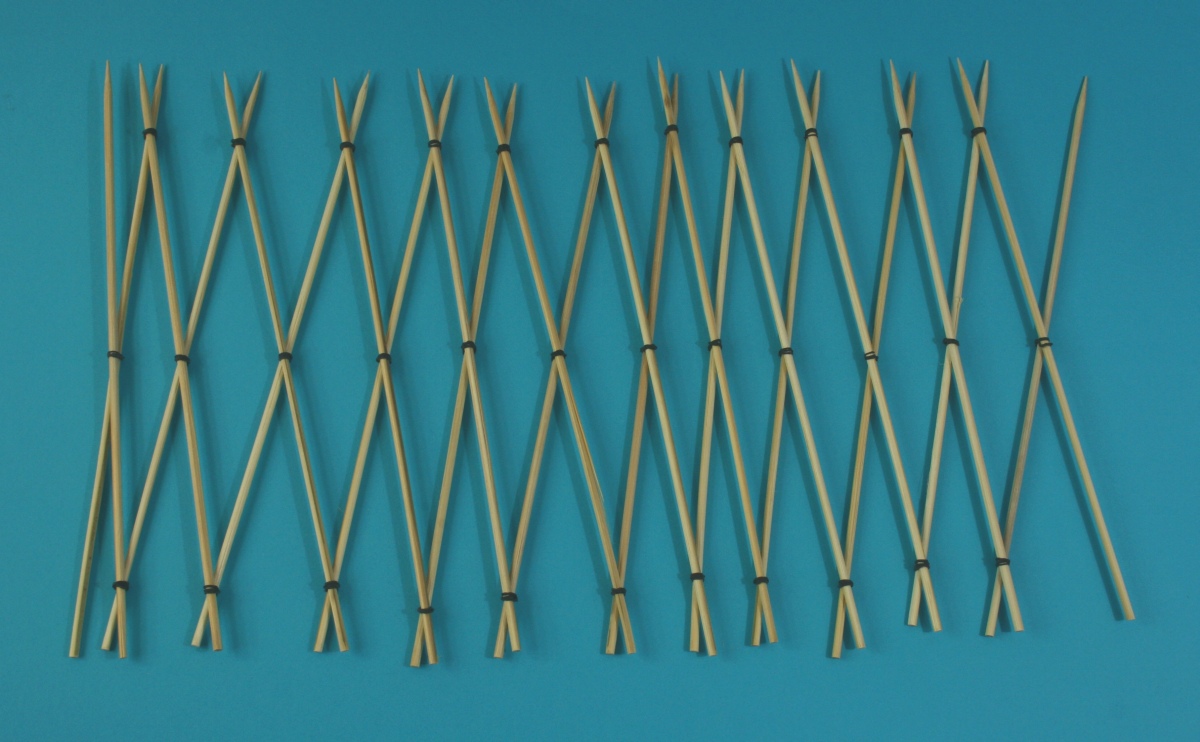
8. Students
may now extend the pattern to twelve X's using the twenty-four
skewers. There should be three straight rows of rubber
bands: one at the centers of the X's, one near the tops, and one
near the bottoms. Ask students to double-check that the
over-under pattern is consistent.
9. When a group has completed a row of twelve connected X's,
double-check the over under pattern and use their model to
demonstrate how to close it into a cylinder. An easy way
to do this is for one team member to hold it upright on the
table and curve it around while the other person places the two
rubber bands that close the cycle. Ensure that those last
two skewer crossings follow the consistent pattern. Ask
all students to do the same, making a cycle of twelve X's.
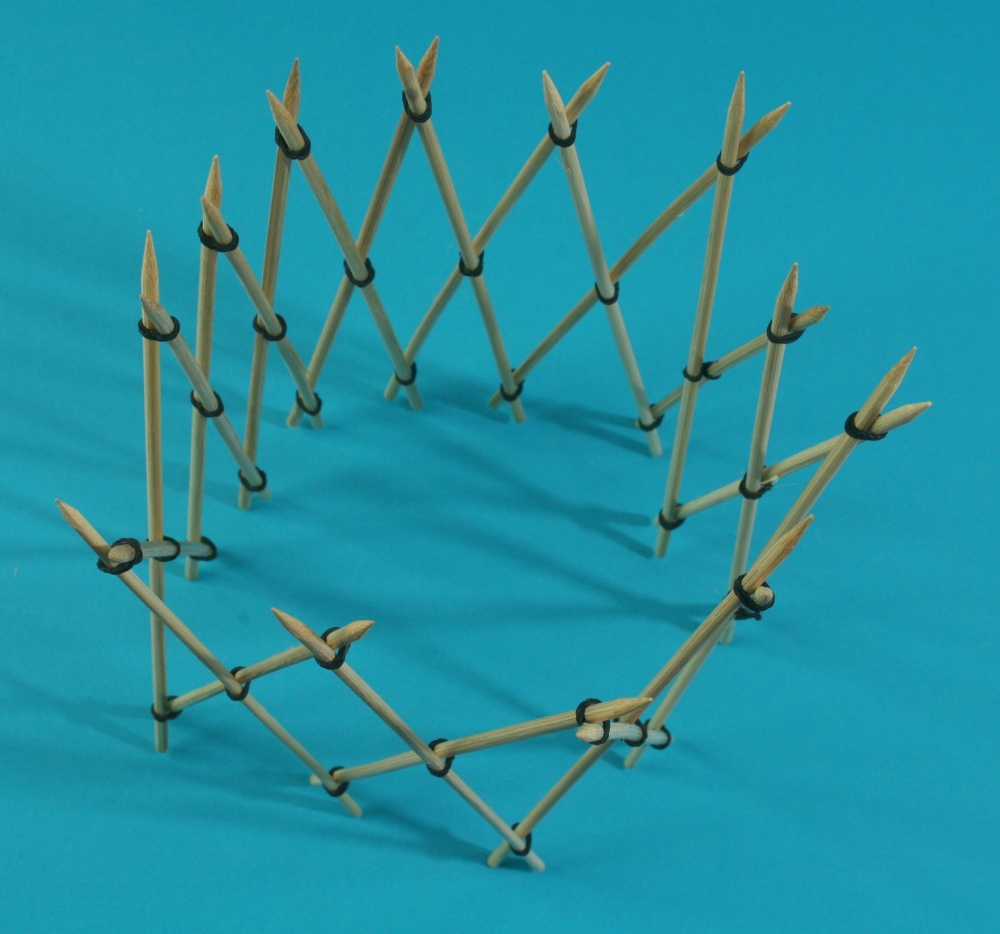
10. Demonstrate how the top and bottom rows of rubber bands can be rolled towards the center row ("the equator"), making room for another row of rubber bands at the top and bottom of the cylinder. When you do this, new X's appear near the tips, inviting you to continue the pattern with an additional row of rubber bands near each end. At the end of this stage, there should be five straight rows of rubber bands.
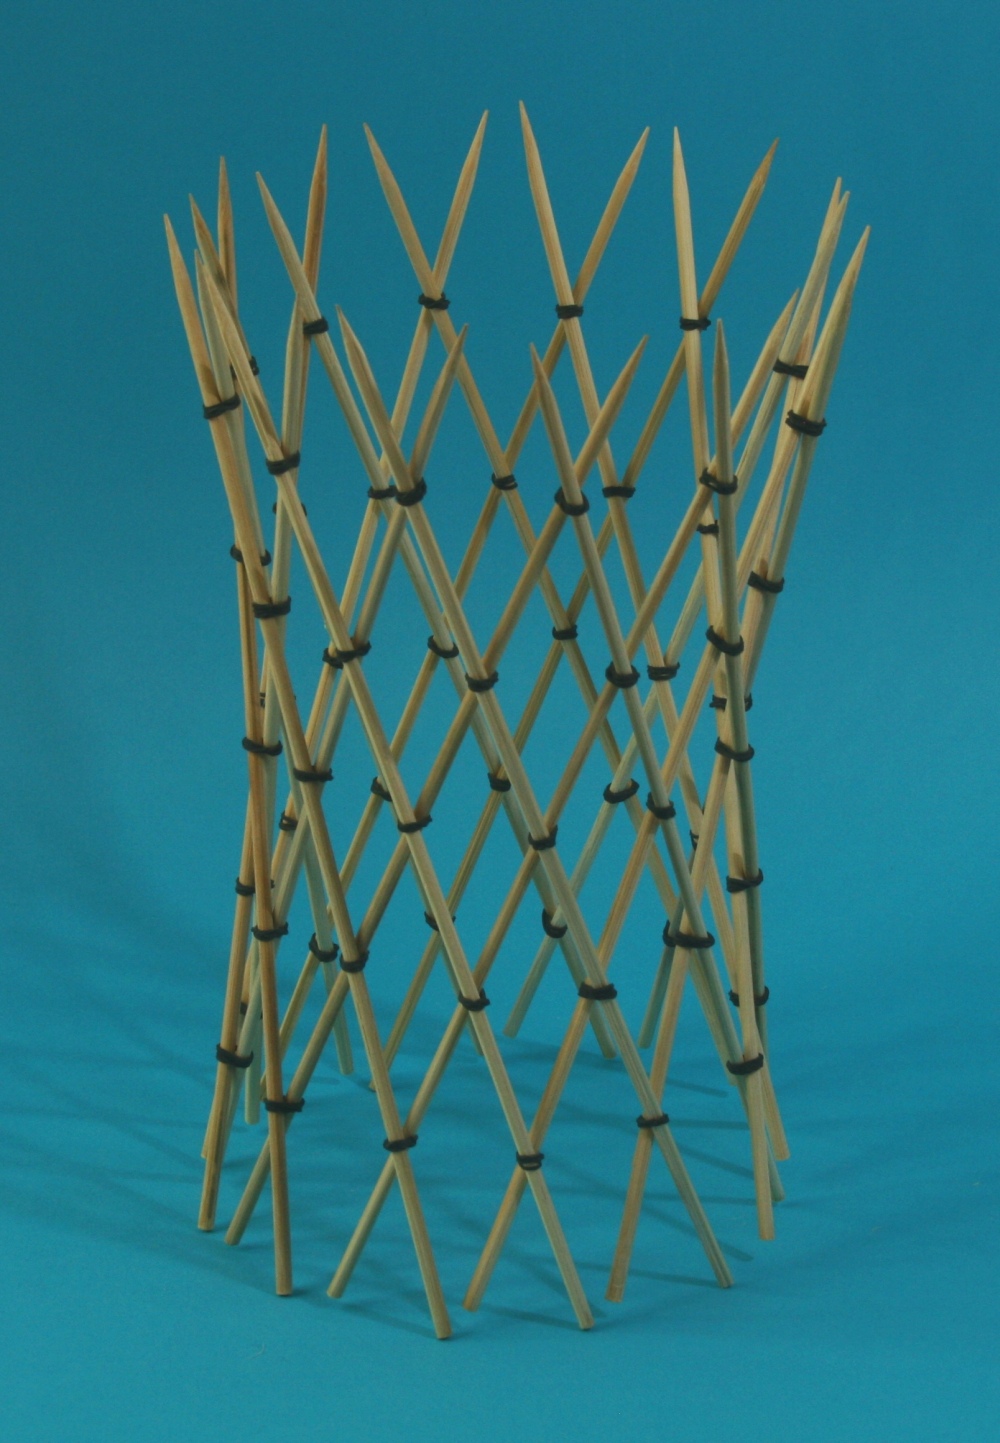
11. Continue
to roll the rubber bands towards the center so rows six and
seven can be added. (Students have discovered that if the
structure is worn like a hat by one partner, the other can add
the rubber bands more easily.)
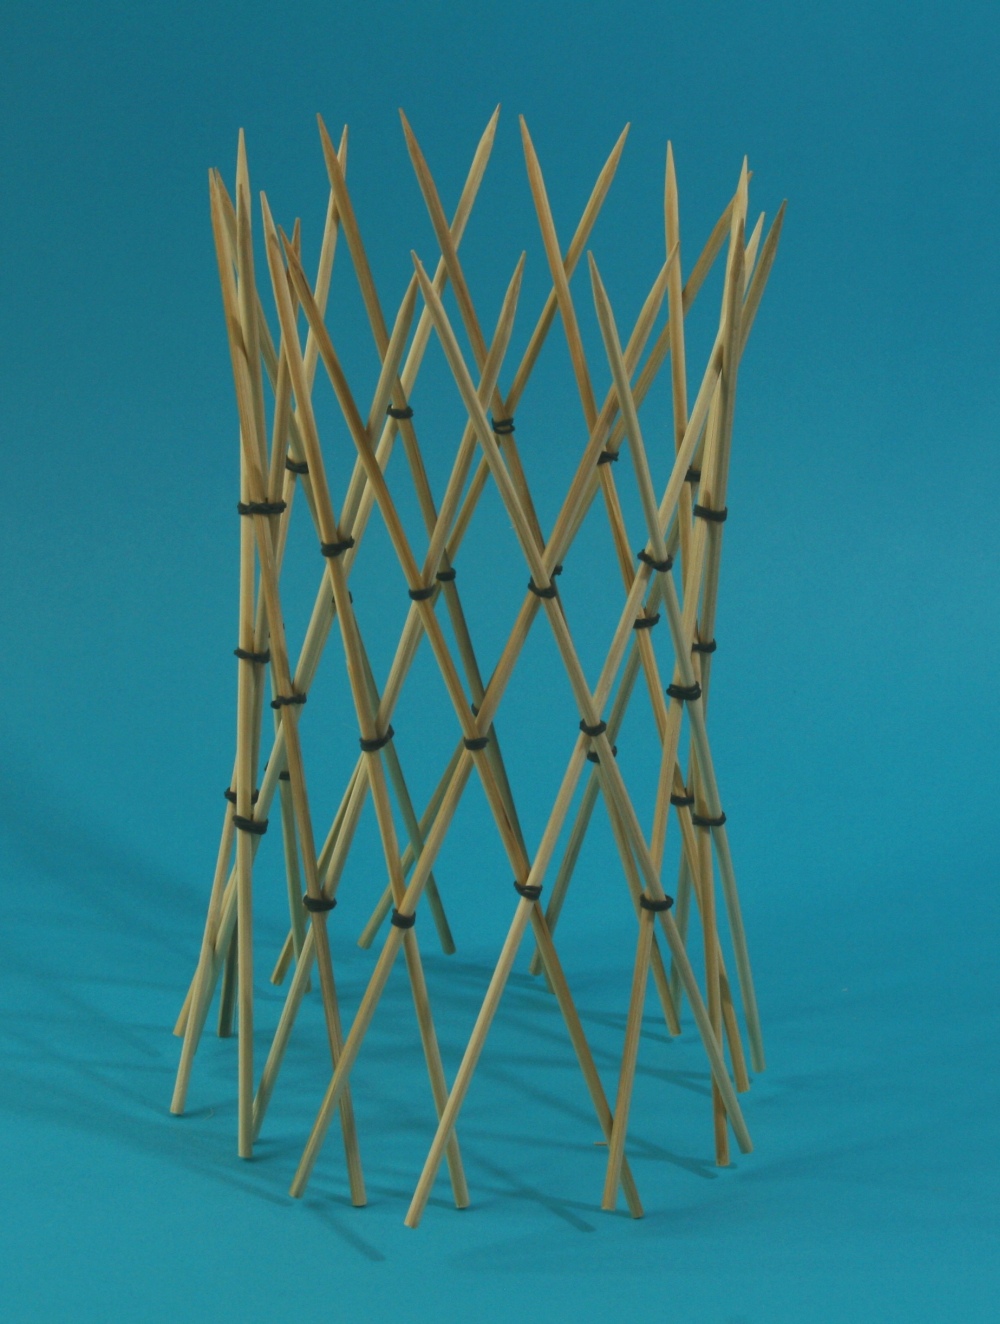
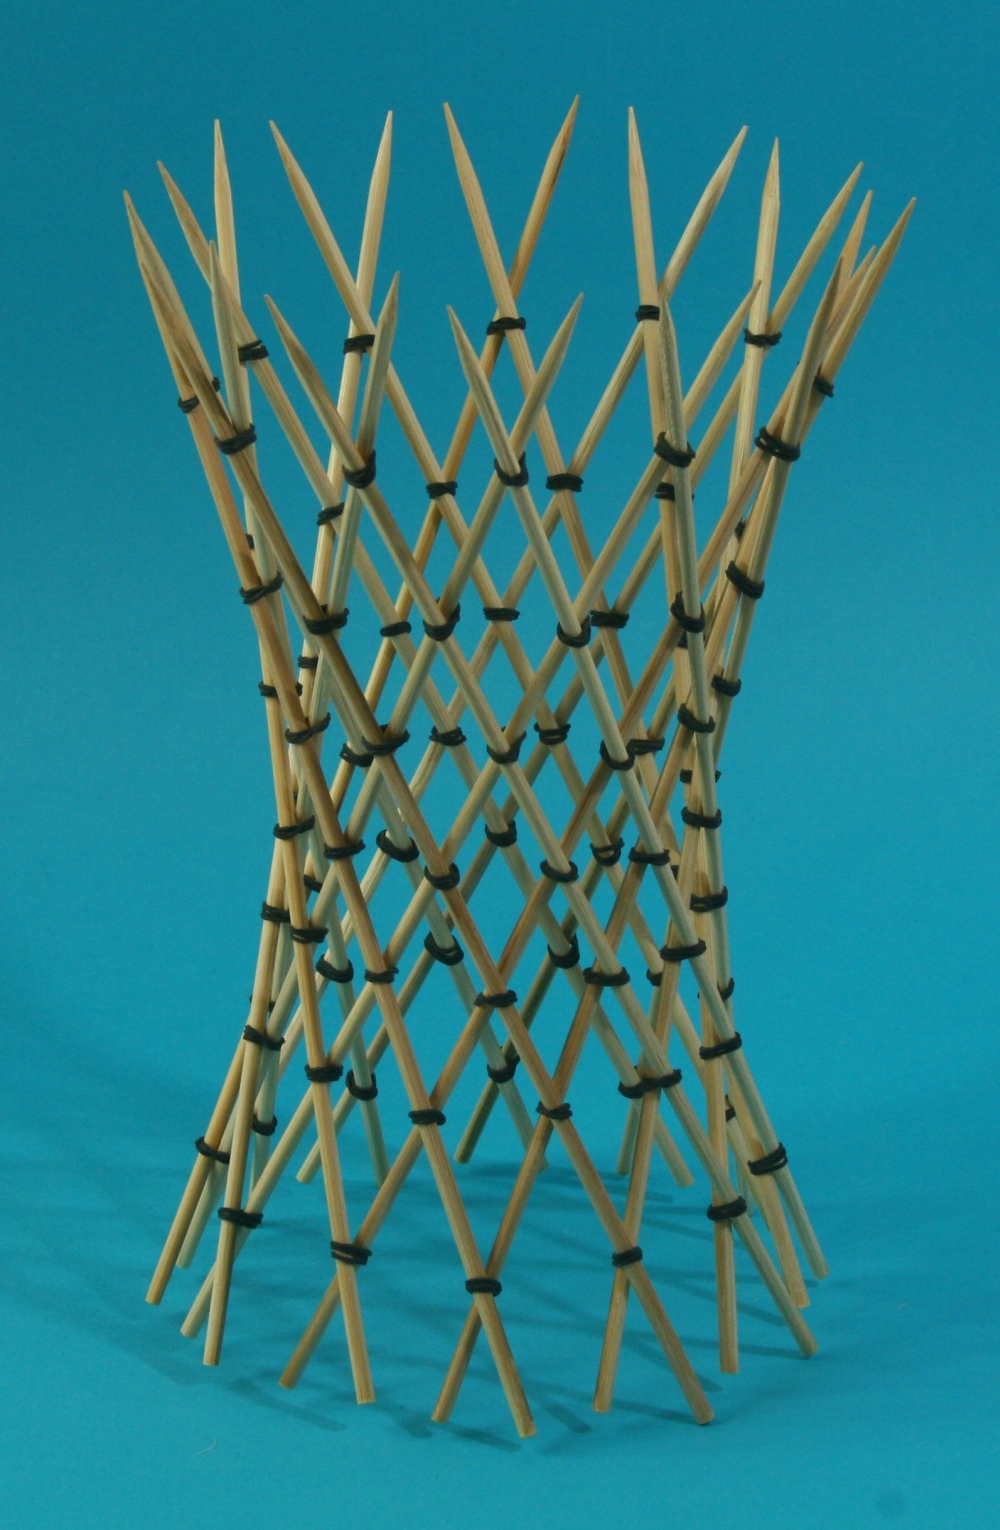
12. The
structure is complete with seven rows of rubber bands.
These rows should be adjusted to be straight and balanced for
optimal aesthetic effect. By this point, students will
discover how their hyperboloid can be flexed to create different
shapes. If it is flattened down to a disk and let go
quickly, it will pop up in the air.
13. Show this
video to explain some of the mathematical ideas and
suggest a larger construction.
Part C.
Group Construction
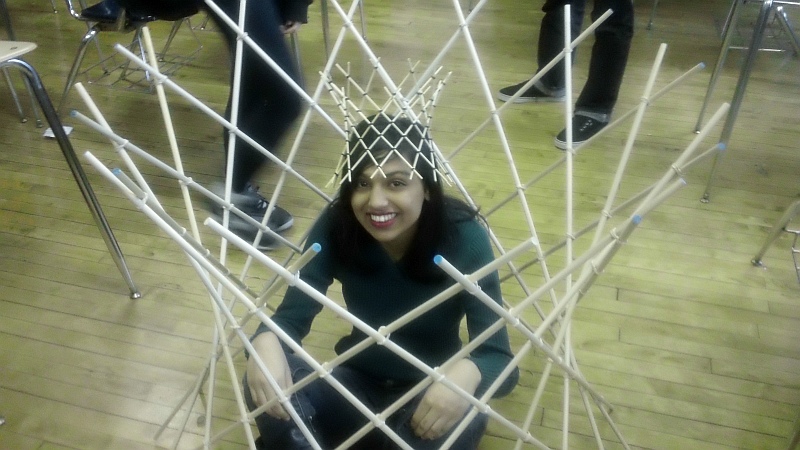
1. As a fun
culminating activity, the class can make a large hyperboloid out
of broomsticks, dowels, bamboo, or any long sticks that may be
affordably available. You might plan ahead to have one
stick per person (rounded to an even number). This photo
shows one made from twenty-four 48-inch dowels that can be
purchased at a hardware store.

2. Begin by telling students how many sticks you have and asking
them to think of a strategy for making a large-scale classroom
hyperboloid. Two natural ideas that might emerge are (1)
to lay the sticks on the floor making the flat X pattern as they
did with the skewers; or (2) to have them stand in a circle and
begin by making the cylindrical pattern of X's. Half the
students can each hold two sticks in an X formation, while the
other half of the students stand between them applying the
rubber bands.
3. After the
class agrees on a strategy, let them take over and build.
Let students decide how many rows of rubber bands make for the
best hyperboloid.
Further
Explorations