Making Math
          Visible

Six-Squares Polylink


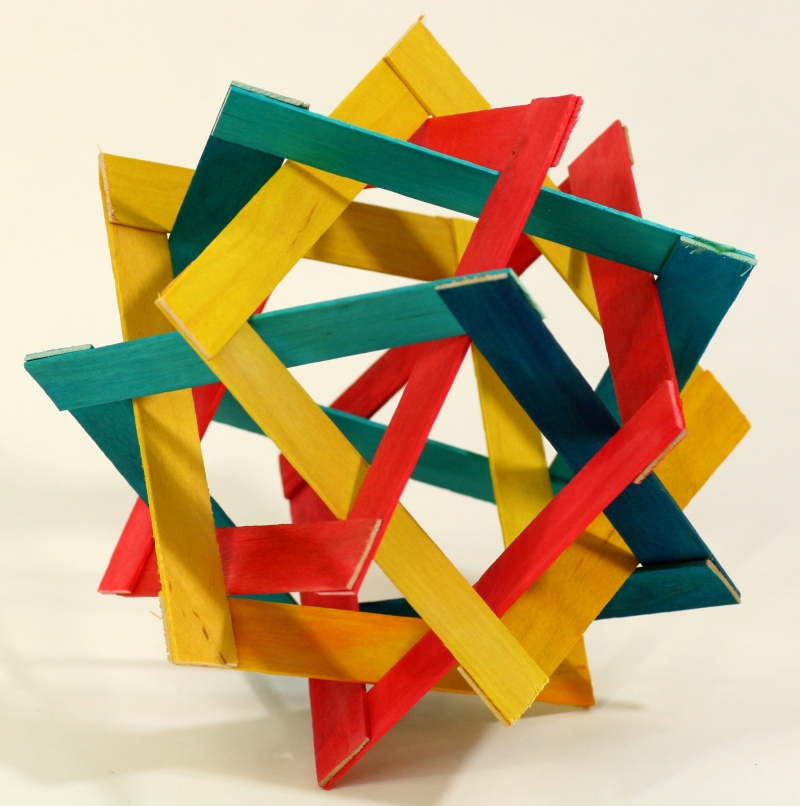
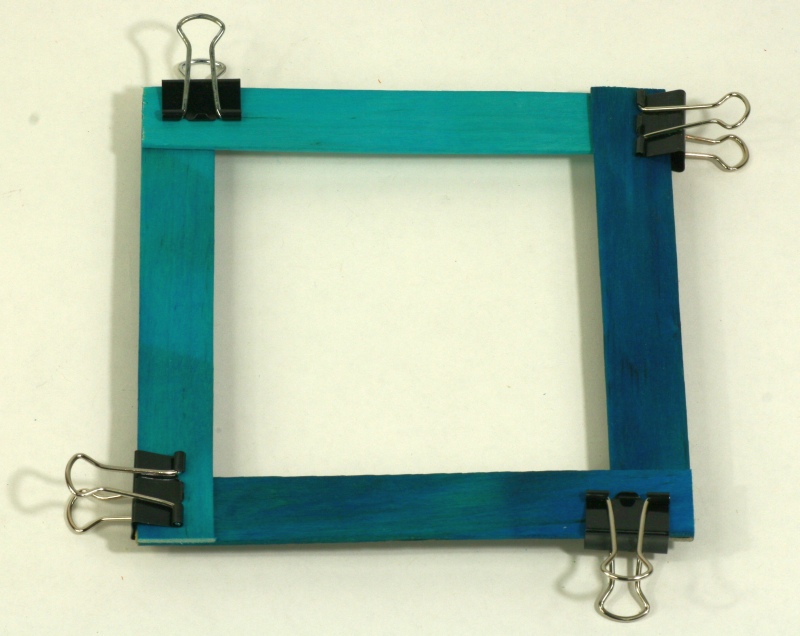
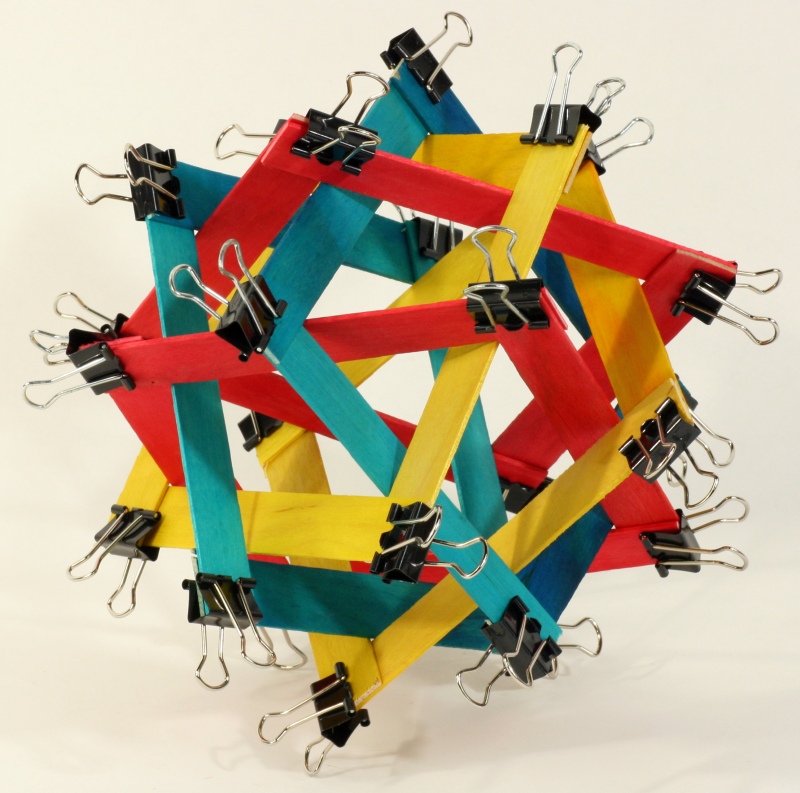
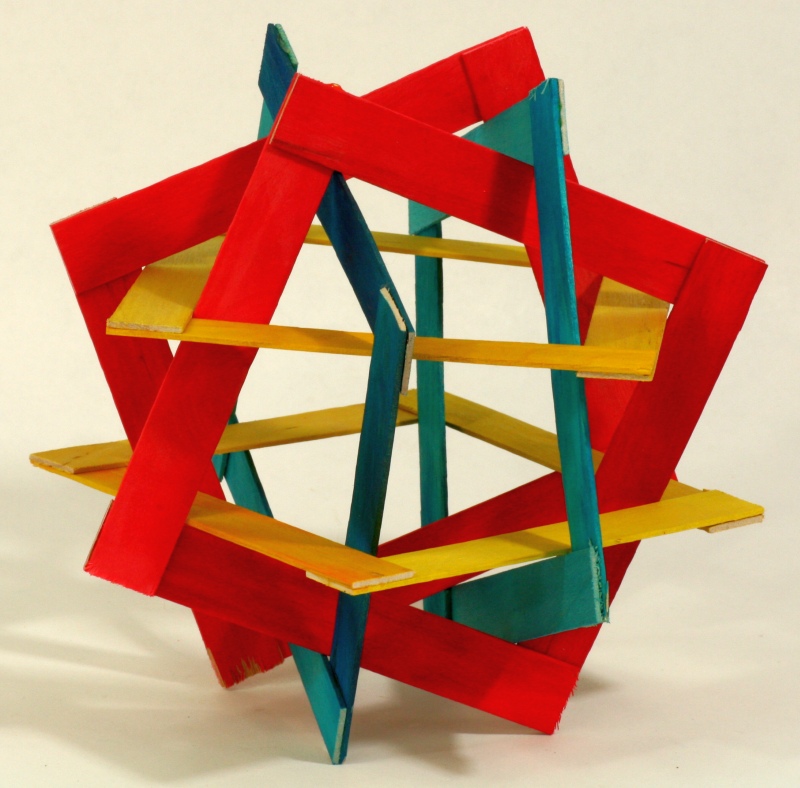
This symmetric arrangement of six hollow squares is a follow-on activity that can be done after the four-triangles polylink. In some 
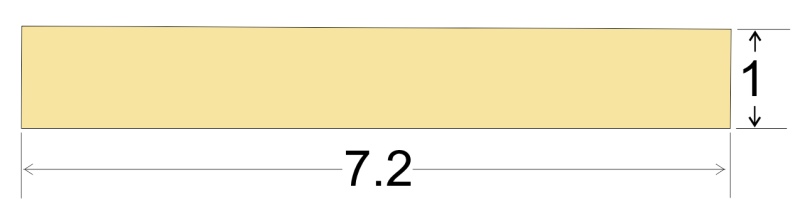
ways it is more difficult, e.g., there are twice as many pieces, 24 sticks instead of 12, and squares may hinge into rhombuses 
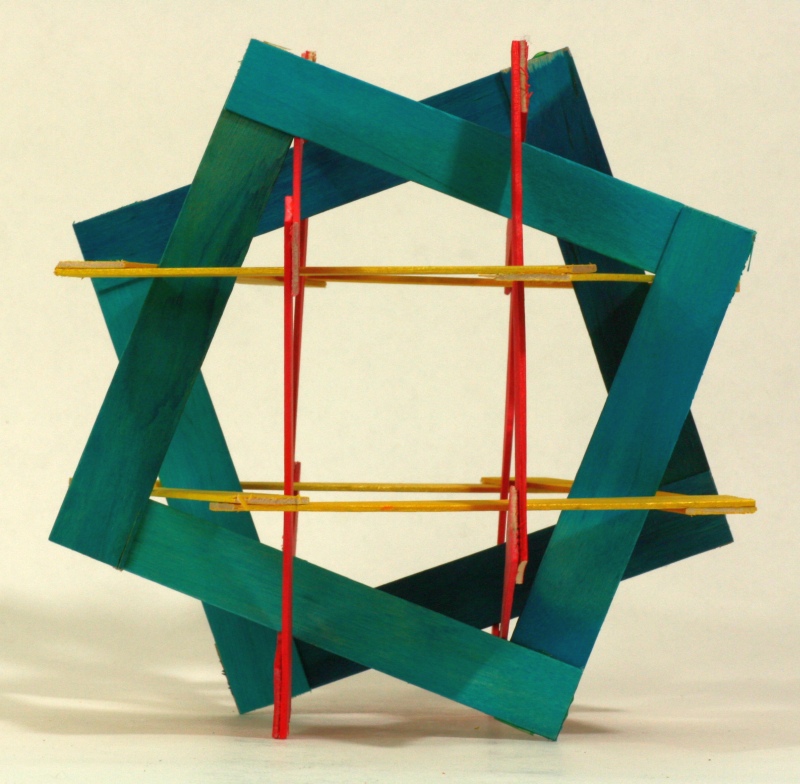
while the triangles were naturally rigid.  But the fact that it derives from the familiar structure of a cube may make it easier for students to visualize and understand.  Again, 
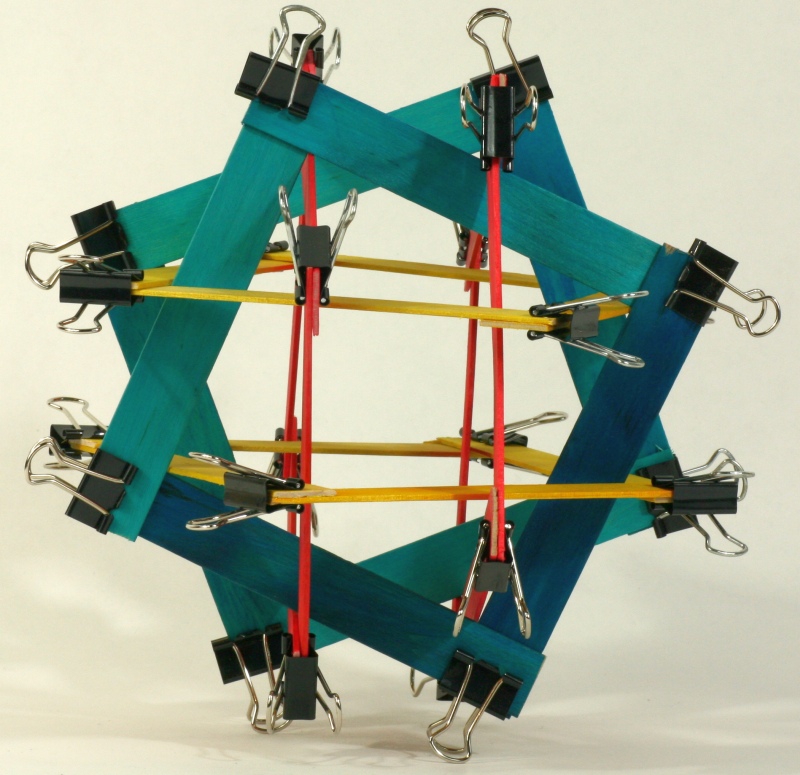
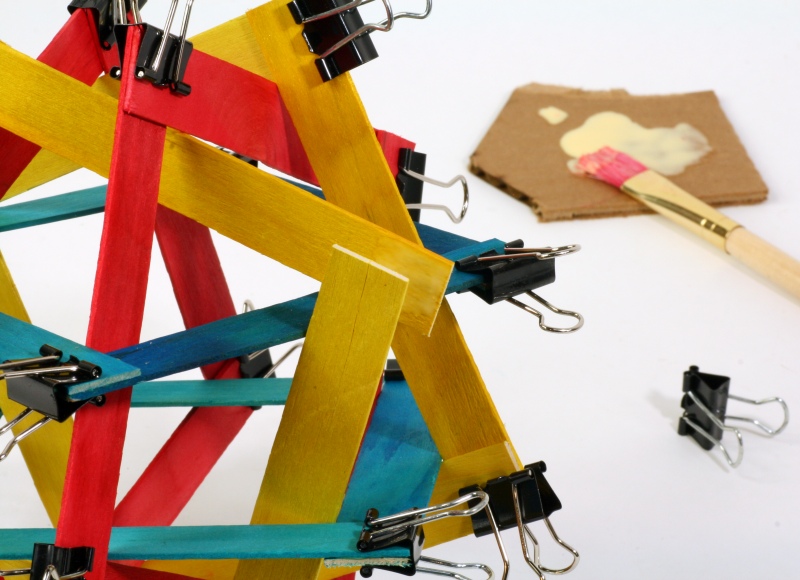
we present it as a puzzle challenge and do not give detailed instructions for every step.  Student should enjoy the satisfaction of finding their own solution path. Communicating their different methods to each other can be an important part of the experience.

The structure may seem inordinately complex from some perspectives, e.g., the image above, but students can learn to visualize, understand, and build it through this hands-on exercise. The beauty and naturalness of the finished object demonstrates to students that the world of mathematics holds many surprising treats that they will discover over their lifetime.

Time Required: 45 Minutes


Materials:
 Notes:

1.  This is the second in a series of three polylink workshops. Do the four-triangles polylink first, as introduction.
2.  You can use uncolored sticks if necessary, but the result looks much better in three colors.
3.  With older students, you could have them mark and cut the ends of the sticks using scissors.  Here, we assume you will prepare the parts before the workshop.
4.  Working in groups of two is highly recommended.  Students will discover that having four hands is helpful when assembling the parts.

Preparation


1. We will cut the rounded ends off the sticks to make rectangles.  The ratio of the length to the width needs to be roughly 7.2 to 1 for a snug fit. We have found that different brands of craft sticks have somewhat different widths. Measure the width of your sticks.  Multiply by 7.2 to get the desired length.  (The U.S. "jumbo craft sticks" shown in these photos are 0.7 inches wide, so should be cut to 5 inch in length.)

2. Mark the ends of the sticks at the desired length.  After you cut one master-stick, you can just trace its ends on to the others.

3. Cut the ends with strong scissors.  (Or a woodworker can cut a stack at a time with a saw.)

4. You need twenty four cut sticks per group, eight per color.


Part A. Minds-On

1. Remind students of the relevant aspects of the four-triangle polylink.  Tell them that today's challenge is to visualize and build a polylink consisting of six hollow squares.  It is related to a cube but instead of having the squares join edge-to-edge as in a polyhedron, these squares will be hollow and connect by linking through their neighbors.


2. Show this video, which illustrates how the six faces of a cube can be separated, rotated slightly, and translated towards the center (magically passing through their neighbors) to form a symmetric linkage.  Ask students to keep that process in mind and try to visualize the structure well enough that they will be able to create it physically.

3. Remind students that in the four-triangle polylink, every pair of triangles is linked like two links of a chain.  As an initial test of their visualization, ask if here every pair of squares is linked as well.  They should be able to understand from the video that squares which started out opposite each other remain in parallel planes and are not linked.  Each square only links with four of the other five squares---the four surrounding neighbors.

4. Tell students that in addition to the geometry, you want them to visualize a color pattern.  They will want the linked squares in their model to be colored differently.  Squares which are not linked should be the same color.  This means parallel faces are the same color but neighboring faces are different colors.  As in the video, the top and bottom can be color 1; the left and right can be color 2; the front and back can be color 3.  The goal is to make a six-square polylink with the analogous color pattern.

5. Ask students to form a mental image of the structure and see whether the special points of inner vertex and edge midpoint that were important for the four-triangles are also relevant here.  They should be able to answer that the inner vertices are important.  It isn't immediately obvious in the video whether the edge midpoints are the contact points.  The four inner vertices of each square do contact the edges of other squares, but it is hard to tell if the contact point on the edge is exactly its  midpoint.  You can show the video again to illustrate.

6. It is worth pointing out that like the four-triangle polylink, this simple, natural, symmetric, geometric pattern was not discovered until the 1970s, also by the chemist Alan Holden.  This is another illustration that mathematics is a living, growing, creative subject.

Part B. Hands-On

1. Divide the class into groups of size two.  Hand out twenty four cut sticks (eight in each of three different colors) and twenty four clamps to each group. 


2. Ask each group to choose a color and make a square from four sticks.  Remind them that choosing a consistent direction of overlap creates rotational symmetry and will look better in the end.

3. Give students the puzzle of building the six-square polylink they saw in the video, with unlinked squares being the same color.  This will take some visualizing, some dexterity, some teamwork, and some persistence.  Each team can decide whether to work with whole squares or to add one stick at a time, and in what order, etc.
 
4. If requested, play the video again to help students understand the desired structure.


5.  It may take a while for students to find a correct assembly, as shown above.  Note that it looks much simpler from some viewpoints than from others.  When a group finishes it, ask them to check: (1) every inner vertex touches some edge and every edge touches some inner vertex.  (2)  The corner overlaps are made in a consistent rotational direction.  (3) Everything is snug with no play between the squares.

6. Students who successfully finish their construction can help other groups.

7. The final step will be to glue the joints so the clamps can be removed.  First, ask students to snug up any looseness in their model.  If any movement is possible, a clamp can be removed, the sticks that meet there can be adjusted to be closer together, and the clamp can be replaced.  Do this everywhere until all the joints are snug and there is no relative motion possible between the squares.


8. Squirt some wood glue on a scrap of cardboard as a palette.  One at a time, remove a clamp, gently open the joint, use a small brush to apply a thin layer of glue inside, and replace the clamp making sure the joint is snug.  Tell students not to apply too much; it shouldn't drip out. To keep track of what has and hasn't been glued, it is easiest to do all joints of one color, then all of a second color, etc.

9. Wait 20 minutes or more for the glue to dry before removing the clamps.  While the glue is drying, you can ask the class to ponder whether all the structures in the room must be the same or whether there might be more than one possible solution to the puzzle.


Part C. Conclusion

Ask students to observe the structure and discuss what they discover.  This helps develop a deeper understanding and the ability to visualize it.  Some observations you might elicit are:


1. Squares of the same color lie in parallel planes.  Squares of differing colors lie in orthogonal planes, i.e., at 90 degrees to each other.  This is clearly seen by looking straight into a fourfold opening.

2. Parallel squares are not linked.  Orthogonal squares are linked like two links of a chain.

3. If two squares are linked, you can see they touch twice. An edge of each sits inside an "elbow" of the other at an inner vertex.

4. Parallel squares are rotated approximately 45 degrees from each other, e.g., the two blue ones in the above image.  The contact point is close to the edge midpoint.  (Ideally, it would be the edge midpoint, but the thickness of the wood, warped sticks, and other real-world issues might make yours look different.)

5. You can stand it up on four vertices so two planes are horizontal and four planes are vertical.  There are six ways to do this, as with a cube.

6. You can stand it up on three vertices.  There are eight ways to do this, corresponding to the eight corners of a cube.

7. When you stand it on three vertices, the colors touching the table are in one of two possible orders, either 123 clockwise or 123 counterclockwise, which is the same as 132 clockwise.  These two types of vertices alternate.

8. There are two possible ways to link the squares when building this structure.  They are mirror images of each other.  One would expect roughly half the time to come up with one and half the time to come up with the other.  Relative to a cube, each square is rotated about its own center slightly clockwise or counterclockwise.  You can look at your model in a mirror to see what the other handedness looks like.

 
Possible Extensions

1. Make the mirror-image version to the first one you made.

2. Make a giant version from cardboard, thin wood, or other suitable material.