Making Math
          Visible

Paper Catenary Arch


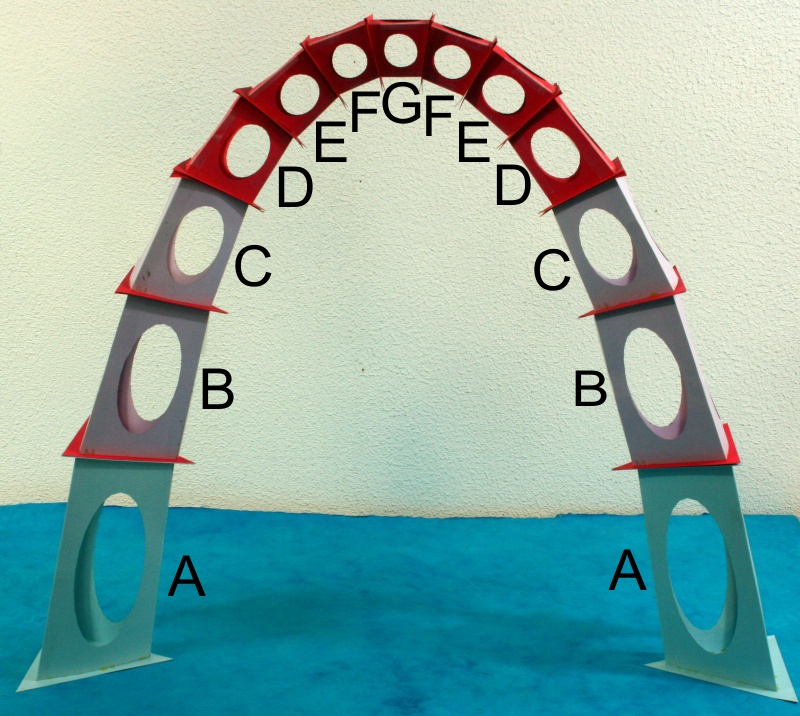
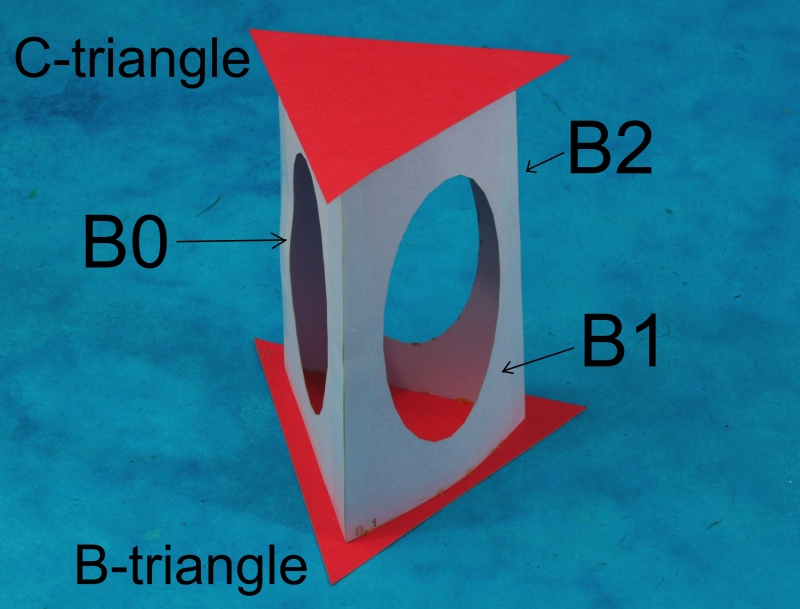
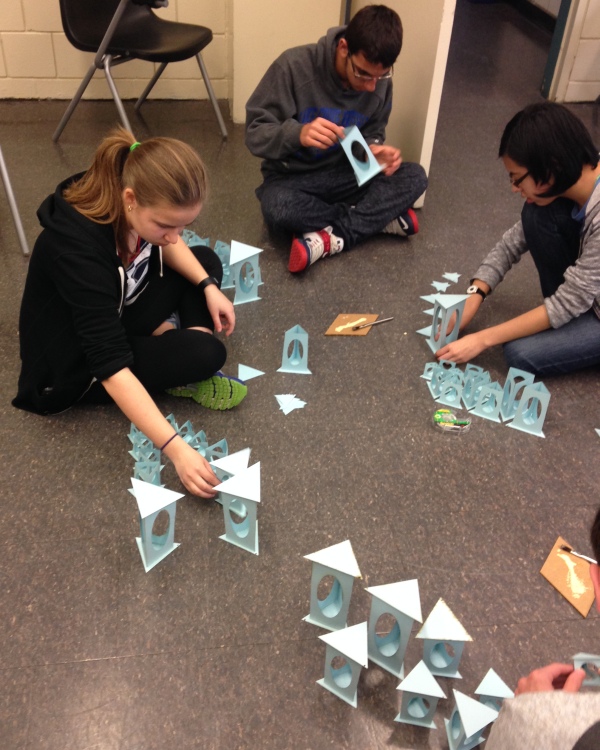
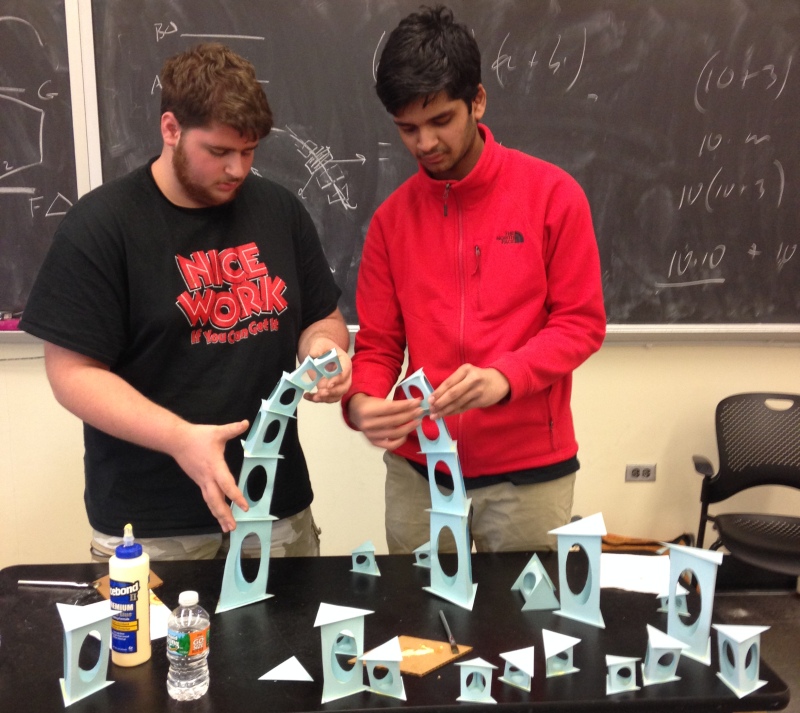
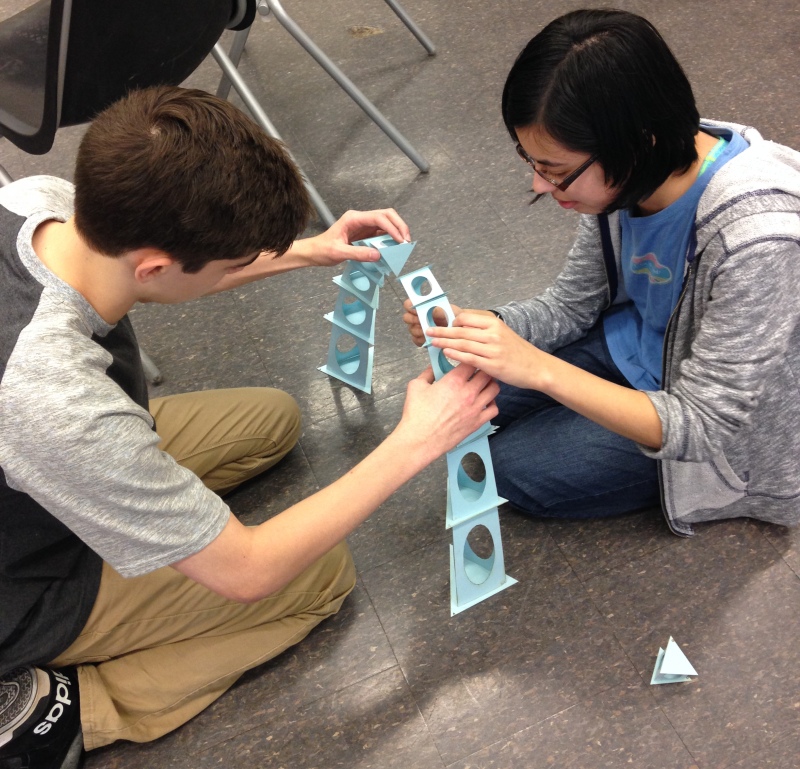
This workshop results in the beautiful paper arch shown above. If the paper components are very carefully cut 
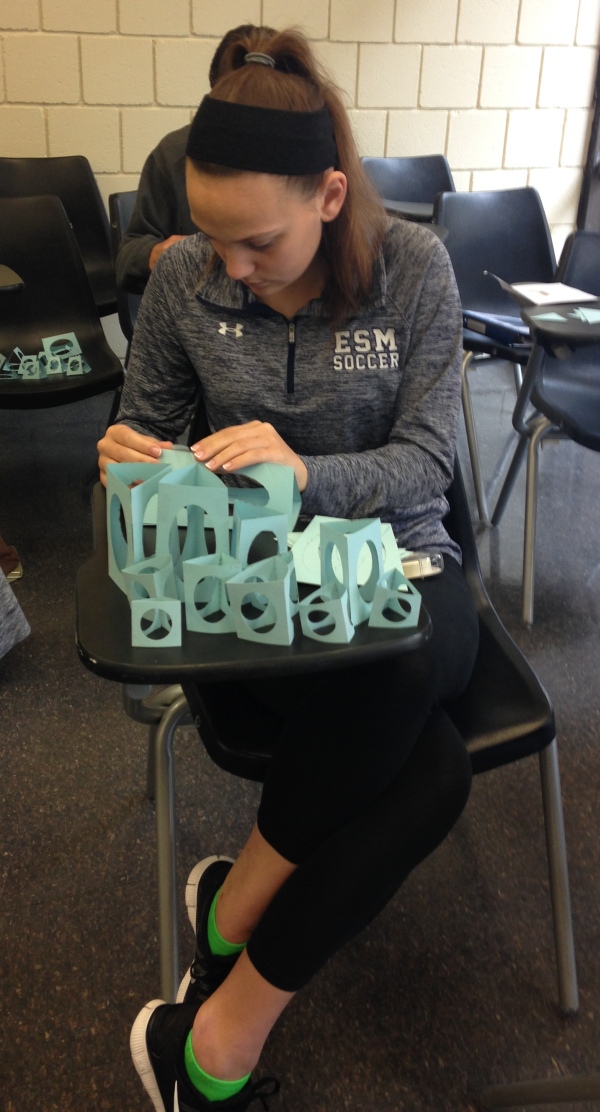
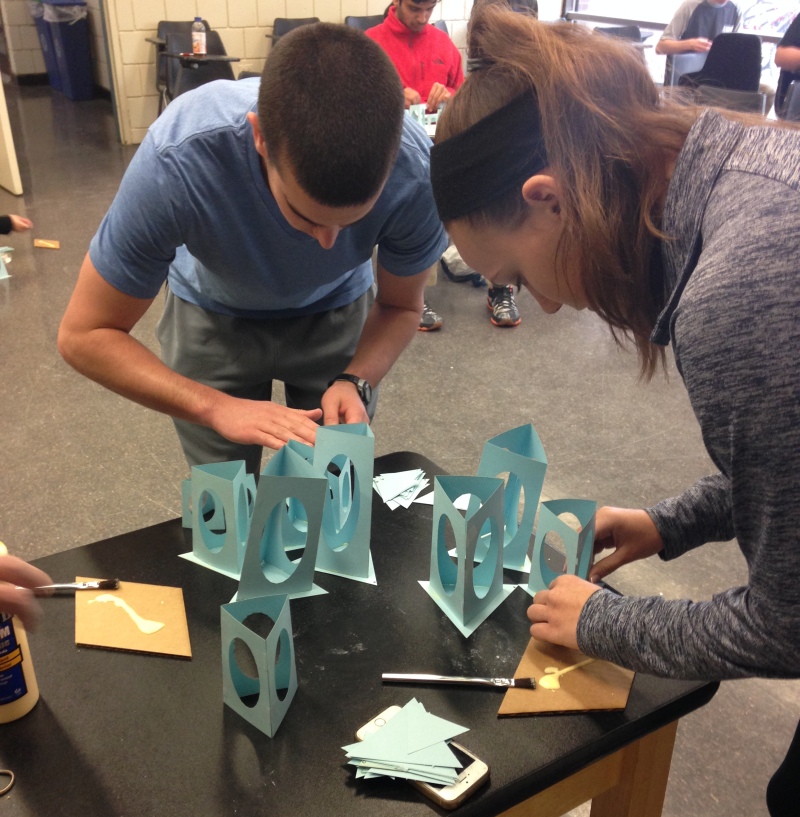
out and assembled as described below, the thirteen modules will balance together to make a freestanding structure.  This 
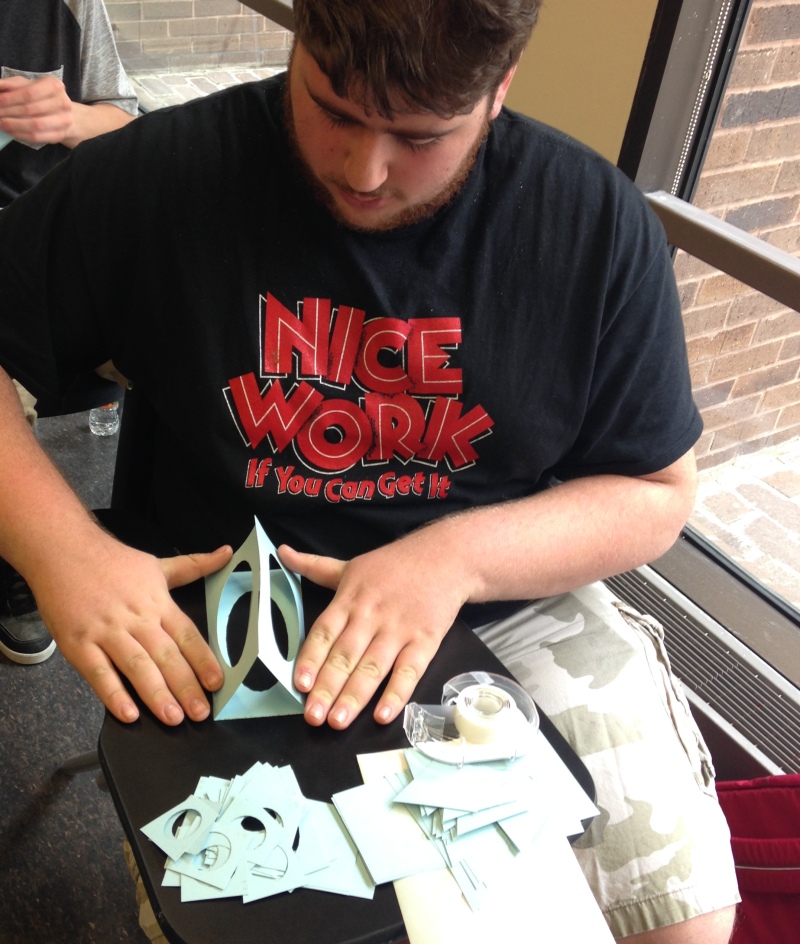
requires very precise fabrication.  An optional variation is to tape or glue the modules together, in which case precision is not as essential, and students can still understand the structure. The instructions below are for the high-precision version.

Time Required: 1.5 Hours


Materials:
 Notes:

1. It is important that the templates be cut very accurately because having precise angles is critical to the final balance of the arch.  A laser-cutter or robotic paper cutter is ideal.  Young students would not be able to do this with scissors, but scissor are adequate if you decide to tape the modules together.
2. Working in pairs is essential for assembling the modules.  Students will discover that two hands are not sufficient.

Part A. Minds-On


1. Introduce the concept of a catenary by showing students a chain held at two points.  The hands can be held closer together or further apart, but all these curves are catenaries. 

2. Ask students if they have seen this shape before.  Invite a discussion about catenaries seen in the world.  Show examples of images such as hanging power lines, clotheslines, jump ropes, hanging bridges, spider webs, etc.

3. Students may suggest parabolas, the cables on suspension bridges, rainbows, or other similar looking curves.  Explain that catenaries are the special curve that results when the only force on the chain is the weight of the chain itself.  A parabola (e.g., the arc of a thrown object) is a slightly different curve.  The curve of a suspension bridge cable is also slightly different, because it supports the weight of the roadway, not just itself.  Rainbows are also different, because they are closer to circular arcs.

4. With older students, you can point out that the equation of a parabola is y=x2, while the equation of a catenary is y=(ex + e-x)/2.  They can plot these on a graphing calculator and observe that they are very similar.


5. Ask students to visualize the shape of an inverted chain (as if it was a chain of helium balloons rising away from gravity).  Discuss examples of this shape in the world. Show images of various stone arches and of the St. Louis Arch.  Note that there are many types of arches, but relatively few are true catenaries with the shape of an inverted chain. [Images above from Wikipedia.]


6. Referring to the above diagrams (which can be drawn on the board) point out that in a chain, the force of gravity on each small segment results in a tension force which is aligned as a tangent to the chain.  (The chain moves itself around until it finds an equilibrium with this property.)  If we invert the diagram to the configuration of a catenary arch, the force of gravity on each small segment now results in a compression force which is aimed as a tangent to the curve.  Furthermore, if the blocks are cut so they meet at joints which are perpendicular to the curve, the compression force along the curve pushes the blocks so they hold together face-to-face. 

7. Historical connection: Before the mathematical properties of catenaries were fully understood, stone masons in medieval times knew this principle and designed arches by inverting the curves they measured from hanging chains.  Before computers, architects such as Antonio Gaudi used the upside-down chain method to calculate the arch shapes in cathedrals. (See link.)

8. With young students, let them play with a chain and get a feel for the catenary curve.  Ask them to hold the chain against a piece of paper on the wall, trace the curve, cut it out, and flip it to make an arch shape.  Their hands might be closer together or further apart, but they are all catenaries.

Part B. Hands-On

1. Cut out the paper pieces beforehand for each group to have one kit.  Students should work in groups of two or more to assemble the parts. 


2. Point out that each piece is labeled for reference during assembly.  Explain to students that they will build thirteen pieces all together, labeled A through G.  There are two of each piece except for G, which is the capstone piece.  Each piece is made from three sides with elliptical openings.  The sides are numbered 0, 1, and 2.  Each piece also has a triangle cap on each end.  The bottom triangle has the same letter as the piece while the top triangle is one size smaller, so has the next letter.  For example the base pieces have sides A0, A1, and A2, with triangle A at the bottom and triangle B on top.  (The exception is the capstone piece, which has triangle G on both ends.)


3. Instruct students to carefully tape together the three sides, matching the edge lengths, without adding the triangles yet.  The labels 0, 1, and 2 should be in that order along the base.  Tell students that neatness counts, that the edges should meet crisply, and that each side should be planar.


4. To attach the triangles to the sides, students will need to use glue.  (Tape will not work as it is not precise enough and could leave gaps that affect the angles.)  Squeeze a ribbon of glue on to a palette of scrap-paper or cardboard.  Either dip the bottom of the sides into the glue or use a brush to add a small amount of glue to the bottom three edges.  Place the glued edges on to the appropriate triangle and let it sit until dry.


5. When the glue for the bottom triangles is dry, do the same thing for the top of each module, turning it over to rest on the smaller triangle while the glue dries.


6. Let the students build their arches.  They will need to be patient and steady-handed.  They will discover that having the two base pieces aligned at the correct distance apart is very important.  Students should notice that the sides labeled "1" form the outside of the arch. If the working surface is slippery, it helps to tape the base pieces to the surface. 


7. Students will gain a great sense of accomplishment when they manage to complete the balanced arch.  This challenge will give them a sense of the importance of careful engineering.

8. If the 13-piece arch is too difficult to assemble, you can combine pieces to make a puzzle with fewer separate modules, e.g., taping the A's and the B's together into a single larger module. 


Part C. Conclusion

1. Discuss the challenges of scaling up this idea to a larger size.

2. Show parts of this video about the construction of the St. Louis Arch.