Wood Dome
Time Required: 1.5 Hours
Materials:
- Laser-cut wood struts and hubs from 1/8 inch thick plywood
using this template (30 short
struts, 35 long struts, 8 five-slot hubs, 15 six-slot hubs, 15
four-slot hubs)
- 50 eight-inch cable ties (optionally in two different colors)
- Wire clippers
- Optional stain if coloring the wood (e.g., ColorCraft
Brusho)
- Zometool or other material to make a model dome
Notes:
1. The paper dome workshop is a great introduction to this activity
and should be done first as it provides all the necessary
background.
2. The template file is designed to make a dome two meters in
diameter. The parts can be scaled for other sizes, but all
parts must be scaled the same amount.
3. Wood struts can be cut with a band saw or laser-cutter. The
laser-cutter file includes a hole for the cable ties to pass
through. If using a band saw, drill the holes. You may
need to sand the pieces to prevent splinters/slivers.
4. Only 6 five-slot hubs, 10 six-slot hubs, and 10 four-slot hubs
are required for the final structure, but you will need the extras
during assembly and in case of breakage.
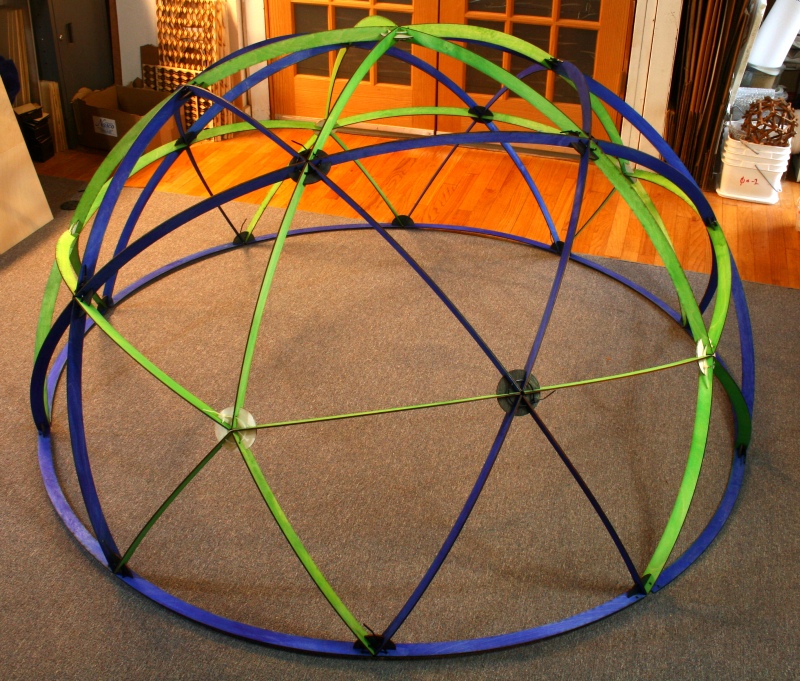
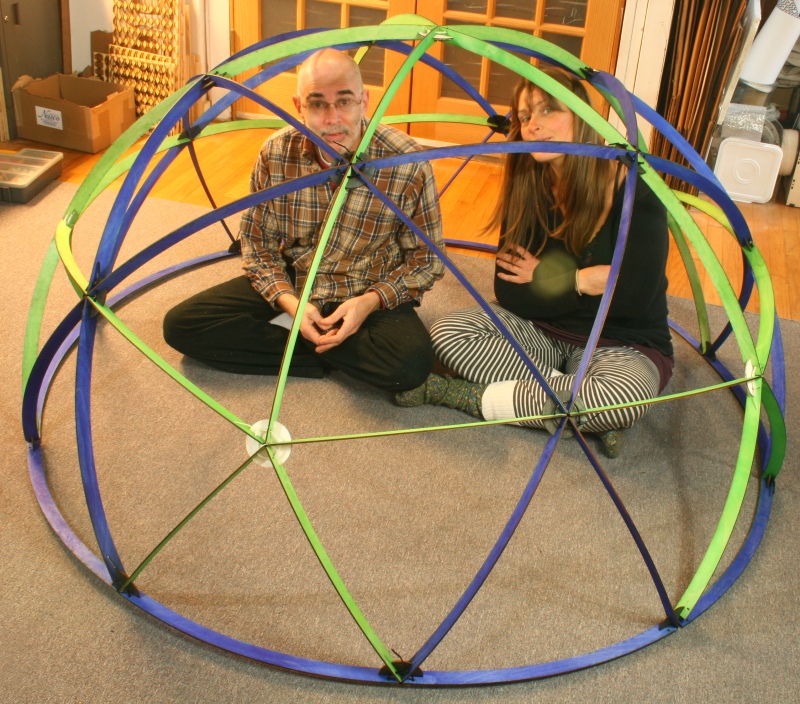
5. The biggest challenge will be to keep track of the two different
lengths of struts, as they are similar. You may want to make the
difference clearer by using a wood stain (or marker) to color code
the two lengths, as in the image above.
6. Eight-inch cable ties work well with struts made using the given
file. If you scale the file, you may need to use a different
size cable tie.
7. Zometool is an ideal manipulative for illustrating the structure
of domes. It has exactly the lengths and angles required for
this particular structure. If you don't have Zometool, you can
improvise with other strut-and-node systems, such as straws and pipe
cleaners, or toothpicks and marshmallows.
8. Students can work in groups to construct the modules.
Part A. Minds-On
1. Hand out blue and yellow Zometool struts and a supply of
connector balls. Giving as little instruction as possible,
refer back to the paper dome and ask students to make a structure
that is isomorphic to it using the Zometool materials. They
will discover that the yellow struts are slightly shorter than the
blue struts and will conclude that the yellows should meet five at a
vertex, with a blue pentagon surrounding.
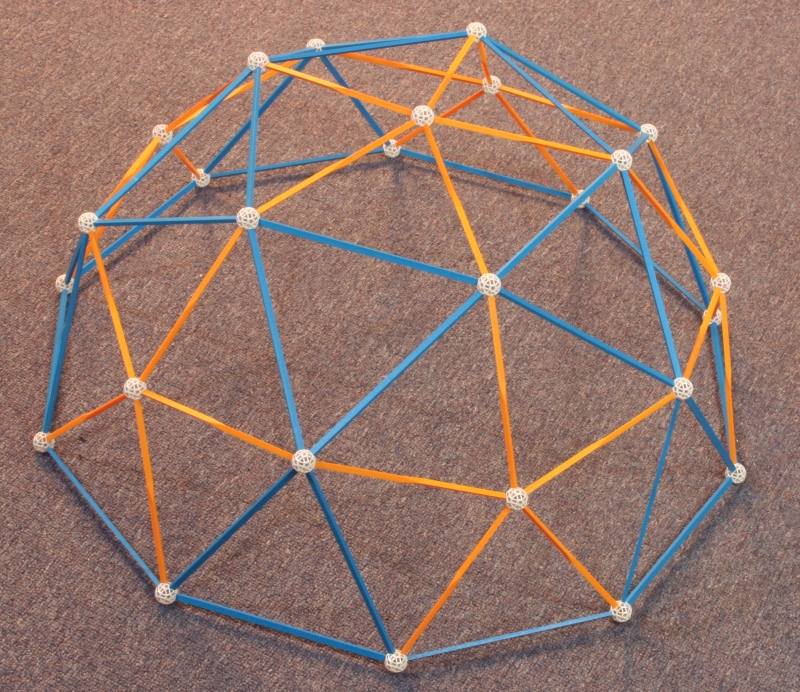
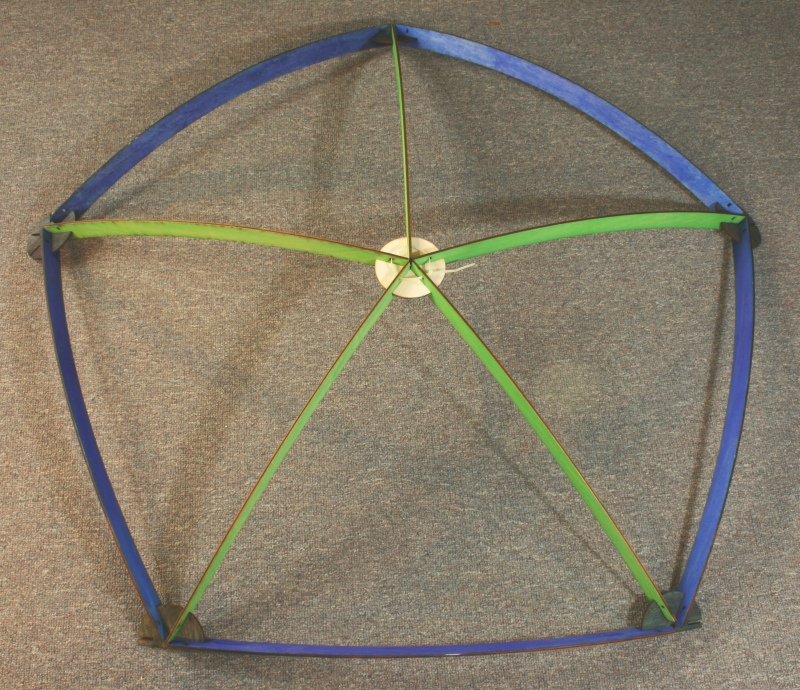
2. Discuss and review the structure and geometric properties of the
dome. In the image above, the yellow struts correspond to the
edges of the underlying icosahedron. The blue struts
correspond to the colored lines that were drawn to create half-size
triangles.
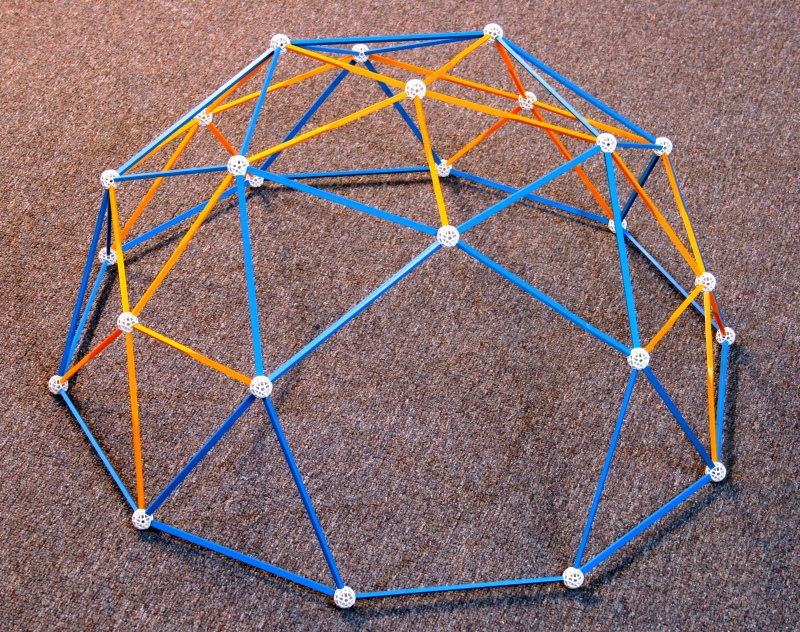
3. Point out that one can remove a "starfish" of five yellow struts
to create a doorway if desired, as shown above.
Part B. Hands-On
1. Give students a quick safety briefing about how to use
cable ties. Cable ties should only be used for construction and can
be dangerous if placed around any part of the body.
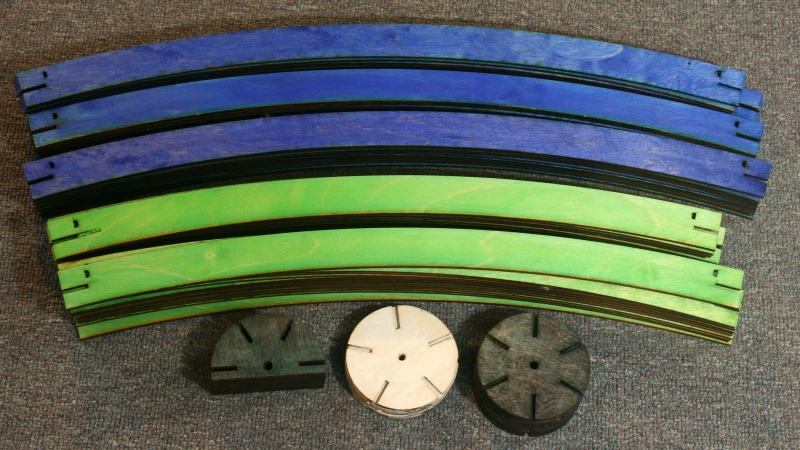
2. Students can work in either three or six groups as there are six
modules to be assembled. Divide the class up and hand out the
wooden pieces accordingly. There are two lengths of strut and
three types of connector. A five-slot hub goes at the center of each
pentagonal module. The four-slot hub is a cut-off version of
the six-slot hub, designed to sit comfortably with its flat edge on
the floor. The "ceiling module" will be slightly different
from the five "floor modules" because it does not need four-slot
hubs.
3. Ask students to make a pentagonal module using ten struts and six
hubs. Five short struts (green in the image above) come
together to make a "starfish" with a five-slot hub (white in the
image above) at the center. This can be secured with a cable
tie that makes a loop through the five holes.
4. Five long struts (blue in the image above) are added to make a
surrounding pentagon. In five of the modules, one of the long
struts forms part of the base of the dome and needs to be connected
with two four-slot hubs in order to rest comfortably on the ground.
Cable ties can be added loosely, but not closed yet, as additional
struts will need to be added later.
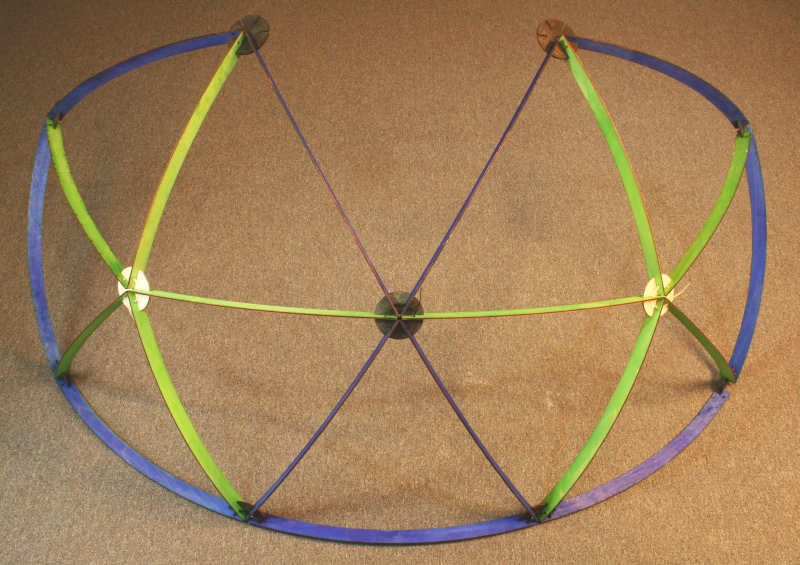
5. Before joining the modules together, ask students to visualize
the entire dome by holding one module horizontally as the top center
piece, and placing the other five around it, each with one strut on
the floor. They will see how the five remaining long struts
fill in the base to make a circle. They will also understand
that when modules connect, one of the redundant hubs needs to be
removed.
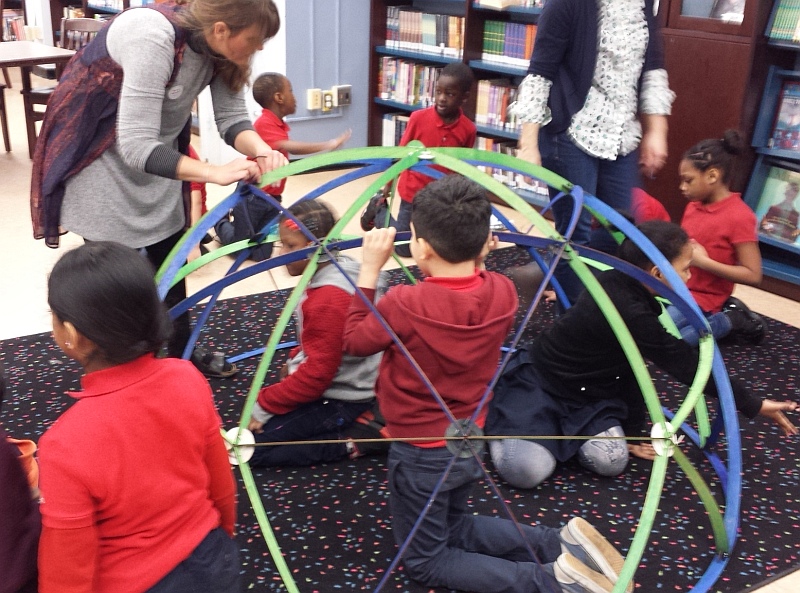
6. Ask students to work together, with some holding the modules in
position while others make the connections. First build the
five sides of the dome, then add the ceiling.
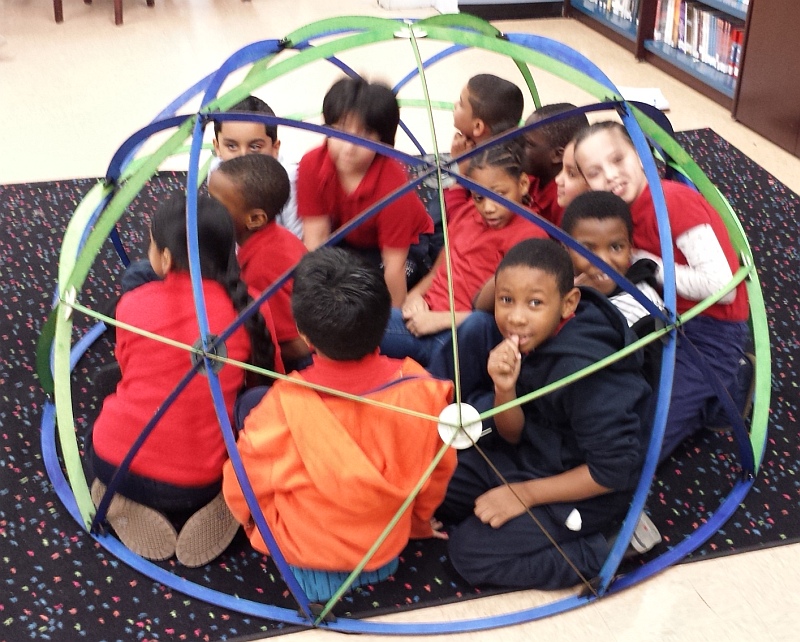
8. If an opening is desired, remove a "starfish" of five short
struts.
9. Cut off the cable-tie tails and enjoy!
Part C. Conclusion
Ask students to compare this wood dome with the paper dome and their
marked icosahedron to observe the analogous structures. (This
provides another example of an isomorphism, as introduced in the 12-Card Star workshop.)
Possible Extensions
See the Paper Dome Workshop
Extensions.