Making Math
          Visible

Spring

Geometric Sculpture III


Spring is a geometric sculpture which students assemble from sixty identical laser-cut wood components.  Cable ties are used to connect the parts together.  The construction activity is a fun group exercise in spatial reasoning which makes clear how mathematics can be applied to art, architecture, and design.  The result is a beautiful 24-inch diameter orb that can be displayed in a school or classroom to help make math visible to students and the community. It will serve as a focal point that sparks mathematical conversations.

We have colored the example above with green and yellow stain, but students may prefer to try their own creative coloring ideas

Time Required:  1 hour for Assembly (not including cutting and optional staining)

Materials:
Notes:
1. This is the third of four related geometric sculpture activities.  For an introduction to the materials and concepts, students should first do the Autumn and Winter sculptures.
2. Only 120 ties are needed for the design, but have extras available because some mistakes will be made, which need to be clipped and discarded.
3. Our example, illustrated above, is stained with Leaf Green on one side and Yellow on the other side.  Other colors, a solid color, or no coloring are all options. 
Part A: Preparation

1. Laser-cut the parts, including the etched lines.  Smoke marks can be minimized by applying laser-safe tape to the bottom surface before cutting or the surfaces can be lightly sanded afterward.  A quick light pass on both sides with an orbital sander (150 grit) removes smoke marks, gives the parts a smooth surface, and prepares them for staining.


2. Two of the edges need to be beveled slightly at 45 degrees, as shown in the above image.  The other edge does not need to be beveled. Only a small amount of material needs to be removed.  It is sufficient to sand down to half the thickness of the wood, as illustrated above. 


3. Material should be removed from the front side, i.e., the side with the etching.  This is done by placing that face down on disk sander or belt sander with the table set to 45 degrees.  Keep the edge parallel to the plane of the sandpaper, so the depth of the sanding is even at all points along the edge.


4. Optionally, the parts can be stained.  Brush on a water-based stain with a foam brush and wipe off the excess with a paper towel.  Let dry.


Part B: Hands-On

1.  Remind students about safety when using cable ties: Cable ties should only be used for the construction and can be dangerous if placed around any part of the body. (See the previous geometric sculpture activities for additional cable tie instructions.)

2.  Organize students in groups of two or three.  Hand out three pieces to each group. Ask students to explore the pieces and how three might fit together to make a module.  


3. In order to familiarize students with the parts, discuss the following observations:  All the parts are identical.  One side (green) has an etched pattern. The other side (yellow) does not.  One end has two straight segments at 90 degrees to each other, beveled on the green side.  (How can one show the angle is 90 degrees?  Put four together on a flat surface.)  The other end has just one straight segment, which is not beveled.  There are four connection points in each piece, where a cable tie will be used to connect it to another piece. The connection points at the three straight edges each have a single hole.  The interior connection point has a double hole.

4. Explain that we will initially make a module of three pieces with three-fold rotational symmetry using the beveled edges.  Ask students to figure out what it might be.  When they have a solution, they can hold their three pieces together in position and compare it to the rest of the class.  Point out groups with the correct arrangement.  Seeing how the beveled surfaces mate should make clear the purpose of the beveling.  (It is possible to position the parts in a similar way but "inside out," however then the beveling of the edges is not used.)  Help everyone see how the 90 degree angles come together like the corner of a cube and the three planes are orthogonal.


5. When each group has the parts positioned properly, hand them three cable ties so they can connect the parts.  Explain that for the box at the end of the cable tie to be hidden, they should begin at the back---the unetched side (yellow here)---which will be more hidden in the final result.  A gentle tug while wiggling the tail will snug up the connection.


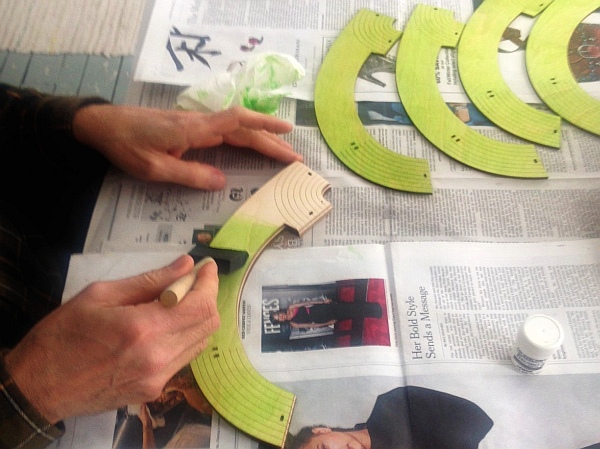
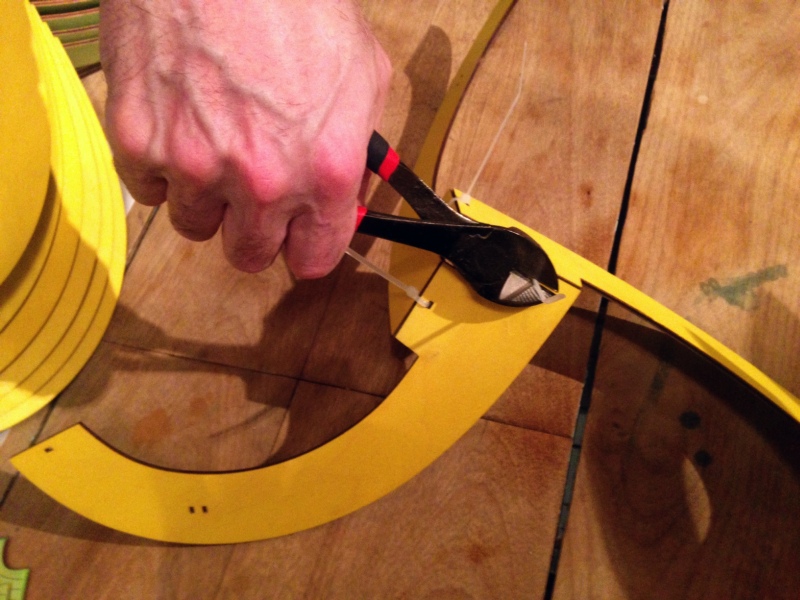
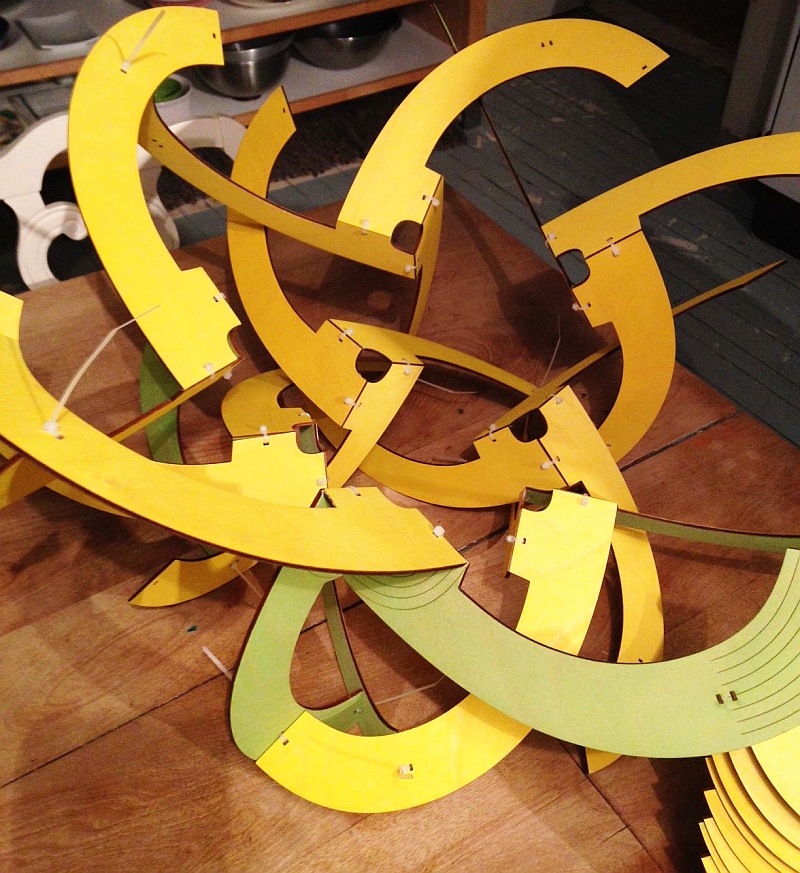
6. Check each module to ensure the parts are properly joined and the ties are tight.  You can snip off the tails with the wire cutter as a mark of which modules you have checked.


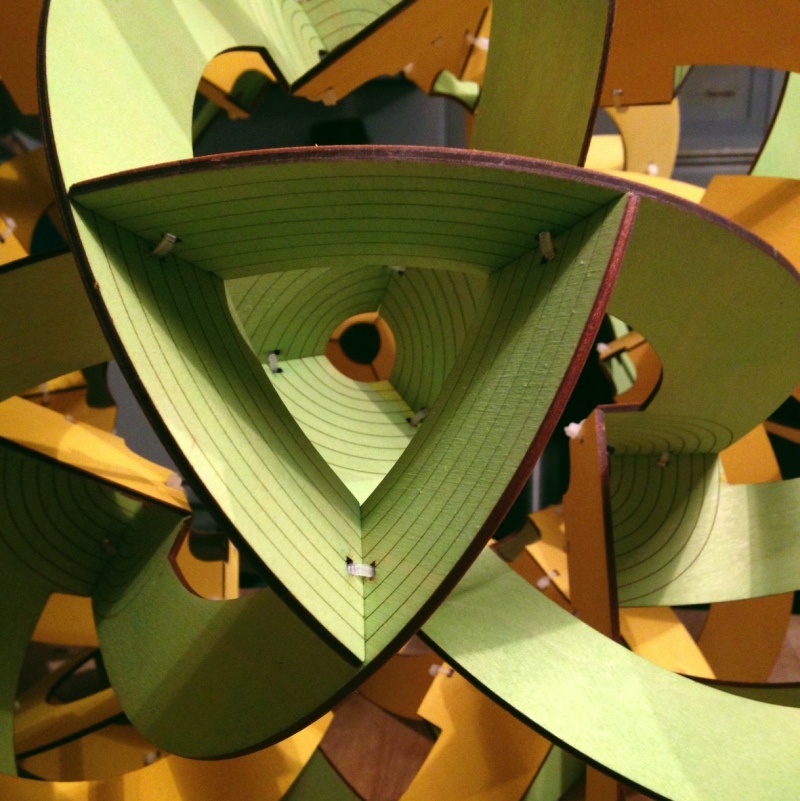
7.  For the assembly, pick a table in a central location that everyone can see.  You can tell the class that the other ends of the parts also meet in groups of three to form 
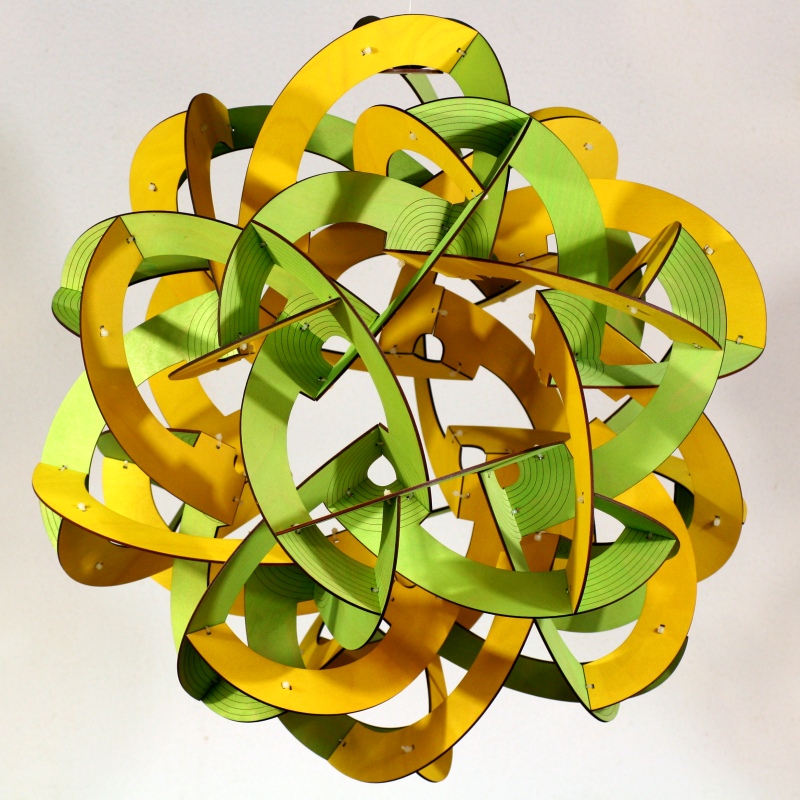
triangles with 3-fold rotational symmetry.  (This triangle is illustrated in the image above.)  Students will now be 
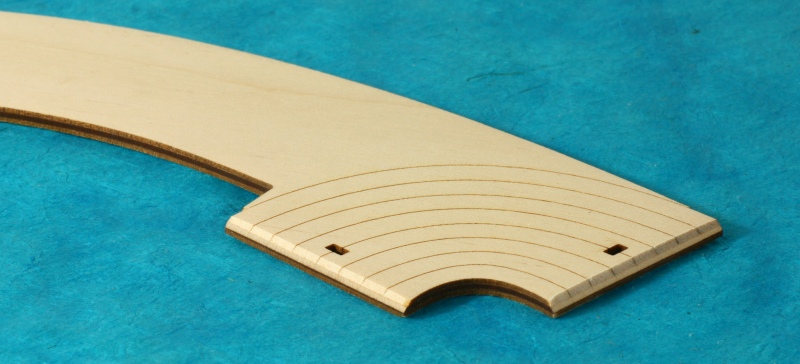
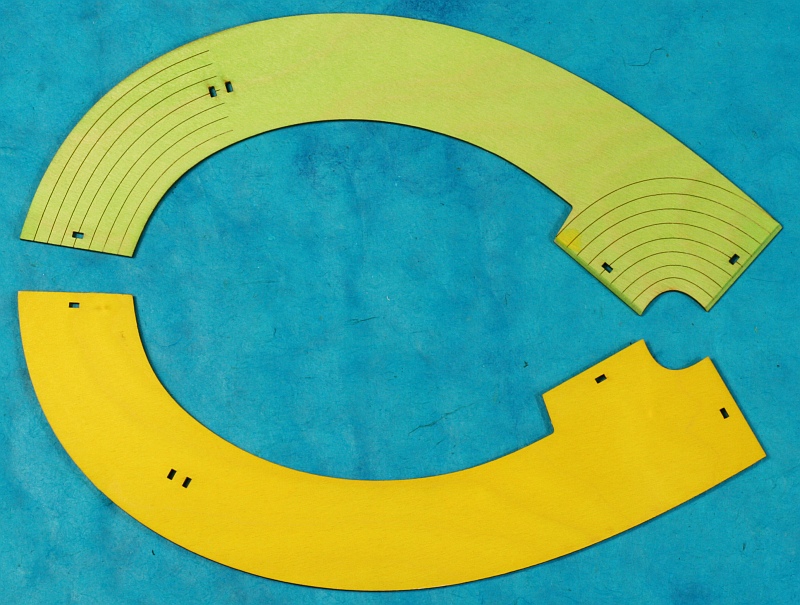
connecting the modules using the un-beveled end of the part and the pair of holes near that end.  For this connection, the un-beveled end meets the front (etched, green) side of the part.


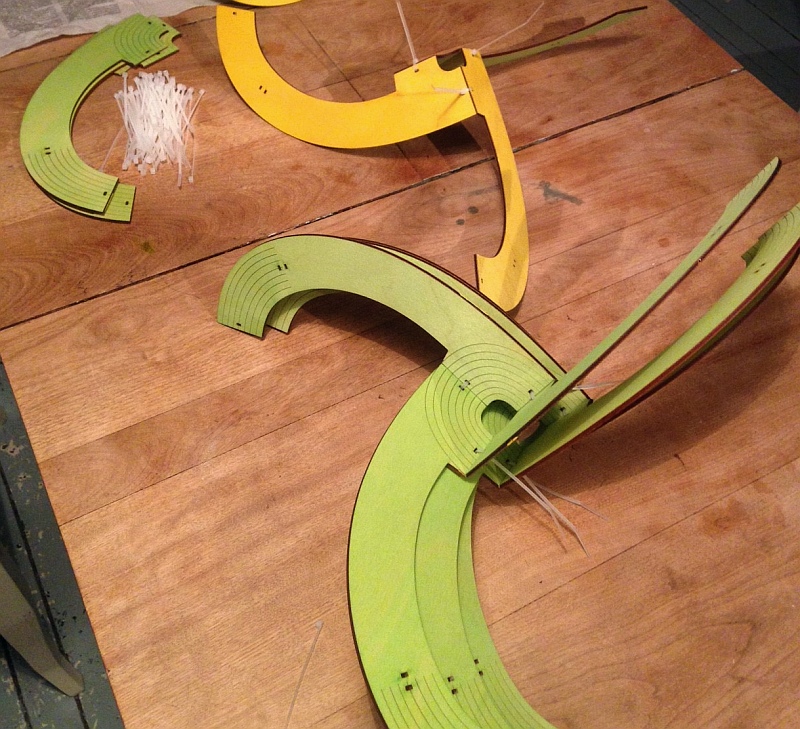
8.  At this stage, the process becomes something of a puzzle.  Groups should take turns bringing their modules to a central location and keep adding modules to a single growing structure. One student can hold a module in position where it is to be attached while other students connect the cable ties.  Encourage each group to have a turn then make room for others.  Allow them to answer each other's questions about where to connect everything.  Students will see the patterns and figure out how to extend them to complete the sculpture.  Any group not working on the growing construction at the center of the room can take three more parts and three more ties and make another module, continuing until nineteen or twenty modules are complete.

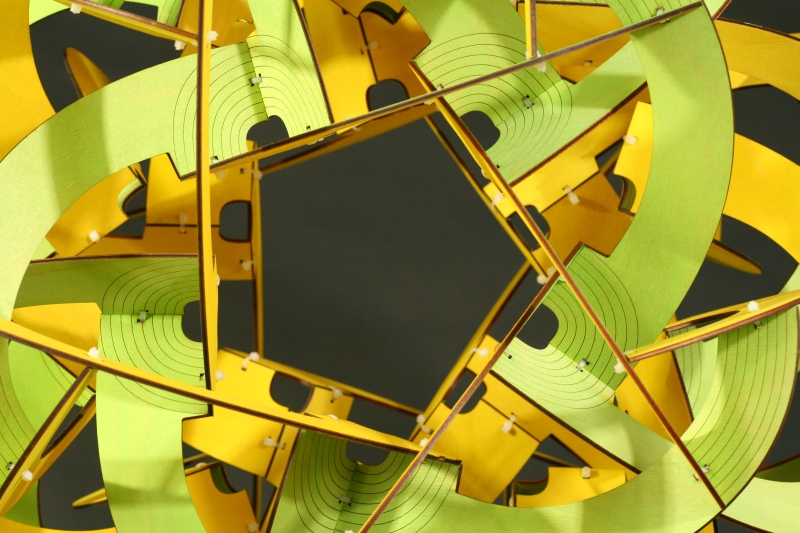
9. A key observation you might want to elicit or point out is that the cube corners form an inner layer and the new triangles form an outer layer.  Each cube corner lies directly inside of a new triangle.


10. Students will also be surprised to observe the formation of regular pentagon tunnels that pass entirely through the sculpture, like the one shown above.  Ask them do determine how many such tunnels there are. 

11. Getting the final module in position requires some gentle maneuvering.  It is best to get the final few modules into position before connecting any of them with cable ties, so there is some flexibility to maneuver.  Alternatively, the final module can be assembled in place from three separate pieces. 

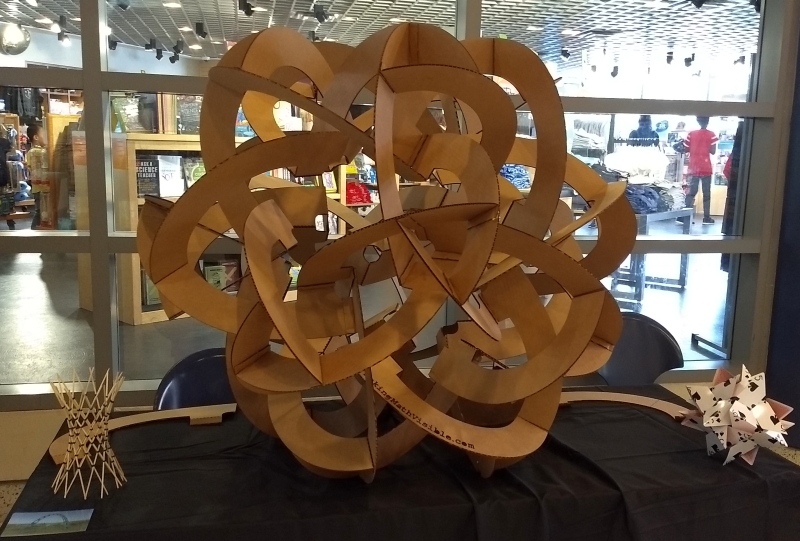
12.  When complete, check all the connections are correct, all the cable ties are tight, and snip off the ends of the ties.

13. While working, you can ask students who aren't engaged in the construction to figure out how many cable ties are needed all together.  From the fact that there are 60 pieces and each touches four others they should determine there are 120 cable ties.  That's 60ยท4 = 240 connection locations, but divided by two because each tie joins two connection locations.


Part C. Conclusion

1. Ask students to relate the structure to a Platonic solid.  They should see it has the same symmetry as an icosahedron or dodecahedron.  The twenty triangular openings are arranged on 3-fold axes.  The twelve pentagonal openings are arranged in six opposite pairs on the 5-fold axes as in a dodecahedron, but there is an interesting difference.  In a regular dodecahedron, opposite pentagons do not have their edges parallel---they point opposite ways, i.e., one is rotated 36 degrees (or, equivalently, 180 degrees) relative to the other.  But here, opposite pentagons do have their edges parallel, as the photo above makes clear.  How is that possible?  (Answer: Imagine starting with a regular dodecahedron and twisting each face clockwise about its center 18 degrees.  By making the same change everywhere, you preserve symmetry.  The 36 degrees of difference is made up for half on each end.)

2. The 2-fold axes are less obvious, but (as always in anything with this symmetry) they can be found by looking halfway between two nearby centers of 5-fold symmetry, or halfway between two nearby centers of 3-fold symmetry.

3. As with the other sculptures in this series, there is no mirror symmetry.  So the sculpture is chiral.  For the opposite-handed version, the parts would be the same shape but etched on the reverse side if the etching is to be on the outside.  The bevel would be made on the other side as well.  

4. Ask students to look for co-planar pieces---more than one part lying in the same plane.  They should observe that each piece has exactly one mate in its own plane, so the sixty parts lie in just thirty planes.  Positioning your eye to be in the plane of a piece and sighting along that plane makes it easy to see the co-planarity.


Possible Extensions


A.  This image shows a larger version made of cardboard.  Instead of using cable ties, the parts are joined with glued flaps as in our cardboard constructions.  The instance shown is four feet in diameter, made using this template.  You can scale it, but don't try to scale this design much larger with cardboard, because it is already a bit flexible at this scale.  Assembly steps are shown here.

B.  Try all four sculpture activities.  Can you adapt the others to cardboard?

C.  Try the Symmetry Search game described here.


Note: The original sculpture of this design is an uncolored version (made of thicker wood) called Celebration of Mind, installed in the Princeton University Mathematics Common Room.  We have adapted it for this Making Math Visible activity.