Paper Triangle Ball

The Paper Triangle Ball is part of a family of "slide-together"
paper constructions that are made by cutting a number of identical
pieces of paper which fit together without tape or glue. In
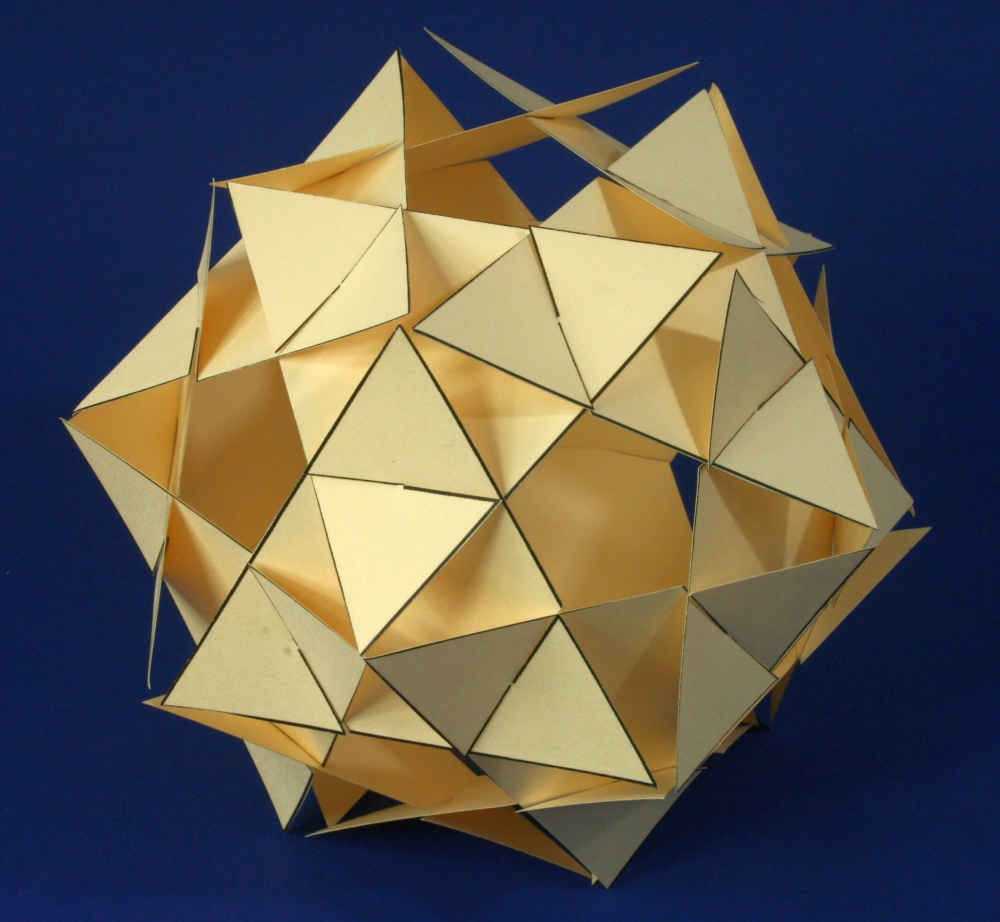
this two-part workshop, students first make a solid-color model to
understand the mechanics of the structure. Then color is
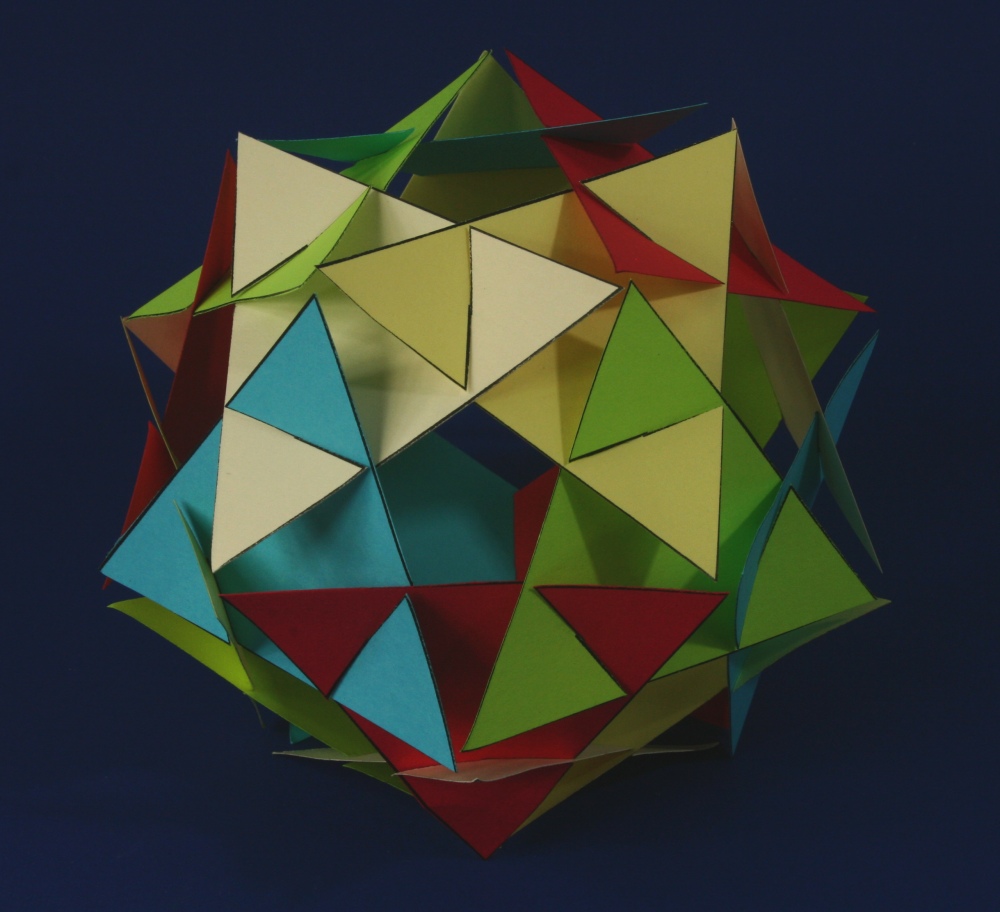
introduced for the second part in which twenty triangles of five
different colors are assembled. This is a logic puzzle that
is a great exercise in problem solving. Students get to use
spatial reasoning to discover and extend geometric and coloring
patterns. When complete, students will have created a
colorful orb which they can take home or use to decorate the
classroom. There is also a nice visual surprise in which
students will see a cube hidden in the edges of the resulting
construction.
The Paper Triangle Ball is a wonderful activity for middle and
high school students to develop concrete and
mental visualization. It can be done with younger
students if they have had previous experience with paper
constructions. This activity works as a
team-building project, encouraging collaboration and
mathematical communication.
This a great example of modular kirigami (assembling cut pieces of
paper) and a good preparation before more complex paper
constructions. In general, explorations with paper can be
mathematically rich, inexpensive, and accessible ways for students
to start thinking three dimensionally.
Before attempting this construction, students
should have built all five Platonic solids, to be familiar with
their geometry and making 3D objects from paper.
This activity provides rich classroom material for teachers
following the Common Core
Standards for Mathematical Practice. This lesson also
provides cross-curricular connections to art, architecture, and
higher-level strands of mathematics.
Detailed
Instructions
Time
Required: 1.5 to 2 Hours
Materials
- Card Stock (white, five sheets
for every four students)
- Card Stock in five colors (one
sheet in each of the five colors for every four students)
- Scissors
- Template (pdf file)
Notes
- Copy the template onto the card
stock ahead of time. Only card stock will work.
Ordinary copy paper is too thin. Card
stock is a heavy weight paper, stiffer than standard paper,
but thin enough to snake through the rollers of a copy
machine or laser printer. Most copy shops have a selection
of colors on hand that they can copy on to for you, or you
can buy it by the ream to put in your own copier.
- Each Paper Triangle Ball is made
of twenty triangles. There are eight triangles on the
template sheet, so two and a half sheets are required to make
one orb.
- The activity works best when
students work in pairs or at most in groups of three. It
can be adapted for students to work individually, but would
require extra time.
Steps
Part A --- Solid Colored Ball
1. Group students into pairs. Hand out scissors and the
printed White card stock sheets. Each pair of students needs
two and a half sheets.
2. Tell students to cut out twenty triangles and
individually cut the three slots in each. Neatness counts! Warn students NOT to
stack the sheets or the triangles, trying to save time and cut
through several sheets at once; that would be too inaccurate.
3. After most groups have cut out at least ten triangles, tell
students that we will begin exploring the shape now and that
they can finish cutting later. Pose the following puzzle,
adding these hints gradually, giving students time at each
stage:
- Find some natural
structures that can be made with the triangles.
- Use the slots somehow. Make
sure they are slid together all the way.
- Make something three-dimensional;
the triangles should not all lie flat on the table.
- The pieces should not be bent or
folded.
- Make something symmetric.
- Use all twenty triangles
- The holes will be
pentagonal---surrounded by five triangles.
Encourage students to
hold up and share their discoveries and give more hints as
needed. Students will likely discover a tetrahedral
structure with four 3-sided holes, an octahedral structure with
six 4-sided holes, and various irregular and planar
structures. Discuss the properties of these structures,
encouraging students to keep exploring. Eventually a group will
find the configuration with twelve pentagonal holes, as pictured
above.
Inform students that is it easier to add one triangle at a
time rather than trying to join larger sub-modules.
Suggest they use teamwork, with one partner holding the
partial orb in the air while the other attaches additional
triangles. Laying it flat on the table will cause it to
lose its shape.
Groups of students who have completed their orb can then help
other teams.

4. Ask students to examine the final result and to
determine how many pentagonal holes it has. Encourage
students to think systematically instead of counting holes
individually.
5. Challenge students to find a cube hidden in the
structure. They will need to look at the edges of the
triangles as separate line segments. First have them
search for a group of four segments that make a square.
The square can then be extended to a full cube.

Part B --- Multi-colored Ball
6. Hand out the printed color card stock
sheets. Each pair of students needs a half sheet in each
of the five colors. They will have a total of twenty
triangles: four in each of five colors.
7. Instruct students to cut out the triangles and make the same
structure but with a coloring rule: Each of the five colors
should appear around each hole. The colors can be in any
order but can not be repeated around any one pentagonal
hole. For example, no hole should have two red triangles
around it.
8. Walk around the room
checking how the constructions progress, helping students and
pointing out any problems as early as possible. A common problem is not sliding the slots completely
into each other. Be sure always to
keep the corners of the triangles on the outside of the
construction, so the boundary of each triangle is completely
visible. Double check as you go along
that every pentagonal opening is surrounded by five different
colors. Keeping the triangles flat
(planar) and having the corners meet crisply is the key to
producing a neat geometric impression.
Warn students that the problem is harder than it looks and they
will have to think logically. Sometimes they may need to
partially undo some of their construction to try a new color
pattern. Some students may need more coaching and guidance
than others. For example, pointing out to think ahead of
time which colors can be ruled out for a given position because
it would create a color conflict in a neighboring pentagon.
Eventually some students will complete their Ball
in a consistent way and will be able to help their neighbors.
9. When complete, ask students to examine their Paper Triangle
Ball more closely to see a cube as before. You can ask how
many there are and see if they can find that there are five
cubes. Each cube has twelve edges, so the five cubes use a
total of sixty edges, which come from the twenty 3-edged
triangles.
10. You can conclude by showing this video
illustrating a family of related paper constructions that might
inspire students to explore further.
Extensions
11. Ask students to examine the
color pattern on each other's Paper Triangle Balls to
determine whether all the balls in the room are
identical. Are there many different color
patterns? They should find that sometimes they can take
two balls and rotate one so it exactly matches the other in
all twenty triangles. In other cases, the two balls are
distinct solutions. In total, there are four possible legal
solutions for coloring the whole ball.
12. The idea can be
applied at a larger scale. Large cardboard versions about five
feet in diameter can be made from sheets of cardboard.
13. You can ask students to find a rule that anyone could
use to select the appropriate color as they put the structure
together. After starting with five triangles to make one
pentagonal hole, the rule should look at what is already made to
tell you what color you should place in a desired
location.

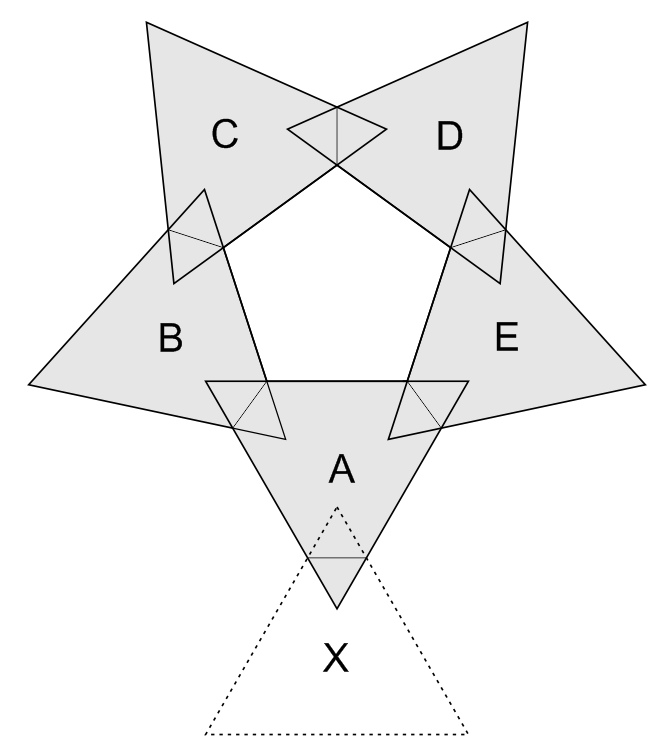
Here is a rule that works, which some students might discover
after studying their completed orb. If ABCDE is a pentagon
of triangles already assembled, when connecting a new triangle
into A, in the position X, choose the color of X to be the color
you observe at position C. You must do this throughout the
entire structure. An alternative rule is to use the color
from D as long as you do that throughout the entire structure.
14. For older students, you
can discuss the combinatorics of the colors surrounding any
triangle. Given any triangle, there are three neighboring
triangles that it slots together with. Given five colors, ABCDE,
how many ways can you choose a subset of three? Answer:
ten. ABC, ABD, ABE, ACD, ACE, ADE, BCD, BCE, BDE, CDE.
Students can be led to observe that each of those ten
combinations happens exactly twice on their Ball. The two
positions will be exactly opposite and in reverse order, e.g.,
if one triangle is surrounded by colors ABC in clockwise order,
then the opposite triangle will be surrounded by ABC in
counterclockwise order.
15. The combinatorics of the colors surrounding the twelve
pentagonal openings involves the "even permutations" as
discussed in the Extensions for the Paper Square
Ball activity.
References
Charles
Butler first described this design to us.
Portions
of this material appeared in the 2004 Bridges Conference booklet
of Teacher Workshop materials.


