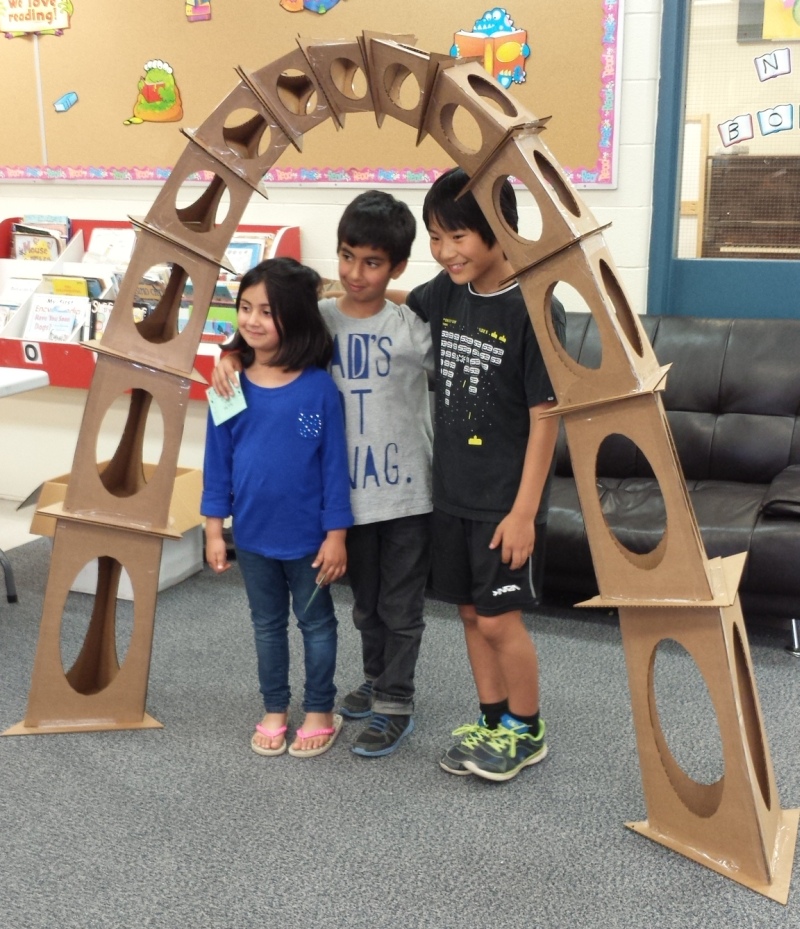
Cardboard Catenary Arch
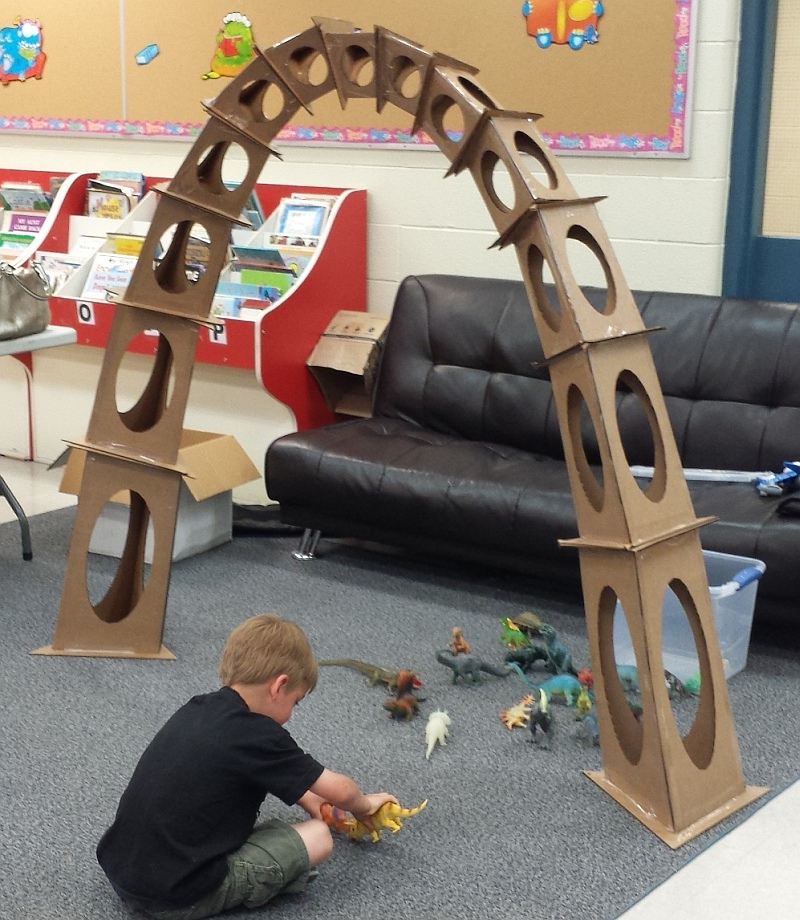
The cardboard catenary arch is a fun project for any
classroom. It is appropriate for students of all levels and
provides an enjoyable construction challenge that is a vehicle for
the exploration of mathematical ideas. Students will enjoy
having this beautiful sculptural creation in their classroom which
will engage them continuously as they repeatedly rebuild it.
With middle school and older students, we recommend first doing the paper catenary arch in order to
give them a detailed understanding of the structure and assembly
process. After that, very little instruction is needed for the
cardboard version.
With younger students, we suggest that the teacher prepares ahead of
time by doing the paper catenary workshop themselves, both to
internalize the details and to have a finished paper version for
students to play with. Once students are familiar with how the
paper catenary goes together, they will have a better sense of what
they will make in cardboard and why, as well as an understanding of
the importance of accuracy and teamwork.
Time Required for Assembly: 1 Hour
Materials:
- A model of the paper catenary arch
- Corrugated cardboard, cut using this template.
(e.g., http://www.uline.com/BL_1851/Large-Corrugated-Pads)
Four each are required of Triangles B-G. Two each of parts
A0, A1, A2, B0, B1, B2, C0, C1, C2, D0, D1, D2, E0, E1, E2, F0,
F1, F2, Triangle A. One each of parts G0, G1, G2.
- Several rolls of packing tape
Notes:
1. This is the second of a series of three
catenary arch workshops. If you want to create a
three-part lesson, use the Minds-On and Conclusion
from the paper arch workshop.
2. The parts can be sawed or laser-cut ahead of time by the
teacher or by students in a shop environment. A utility knife could
be used instead, but we don't recommend that for students. The
template is scaled so that the larger parts just fit on a 12-by-24
inch sheet of cardboard. You will want to arrange the parts to
pack well on your laser-cutter bed size. If using a
laser-cutter, be aware that laser-cut cardboard can sometimes have
sharp edges, which can be dulled if necessary with a piece of sand
paper.
3. It is much easier to apply the tape if you use a dispenser.
Detailed Instructions
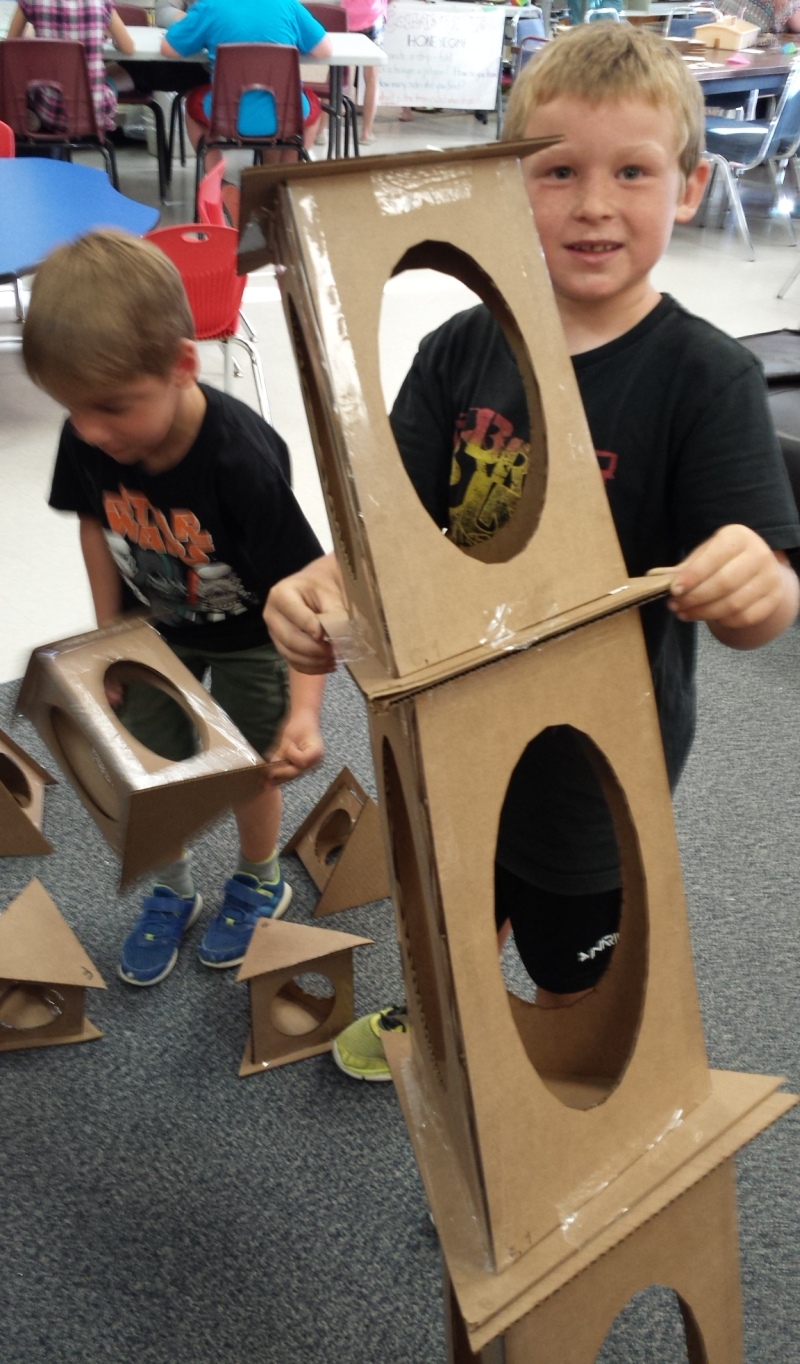
1. If students haven't made their own catenary arch, let them play
with the one you made. They will discover how the thirteen
parts balance and lean on each other to make a stable structure.
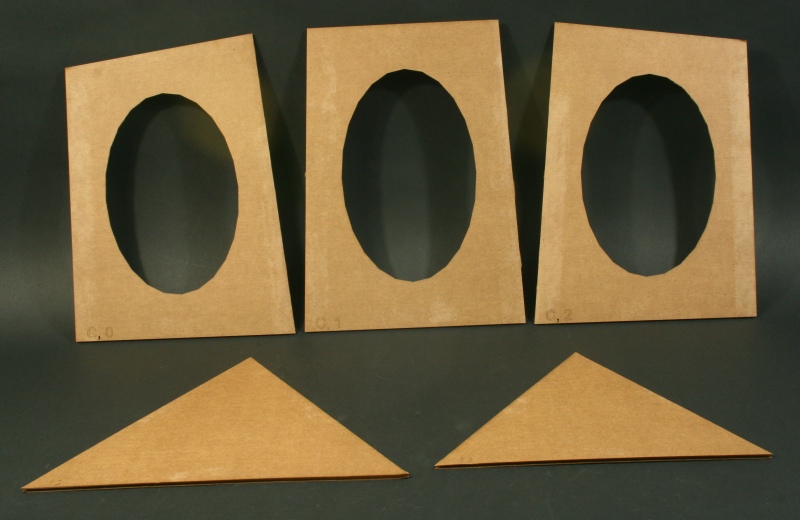
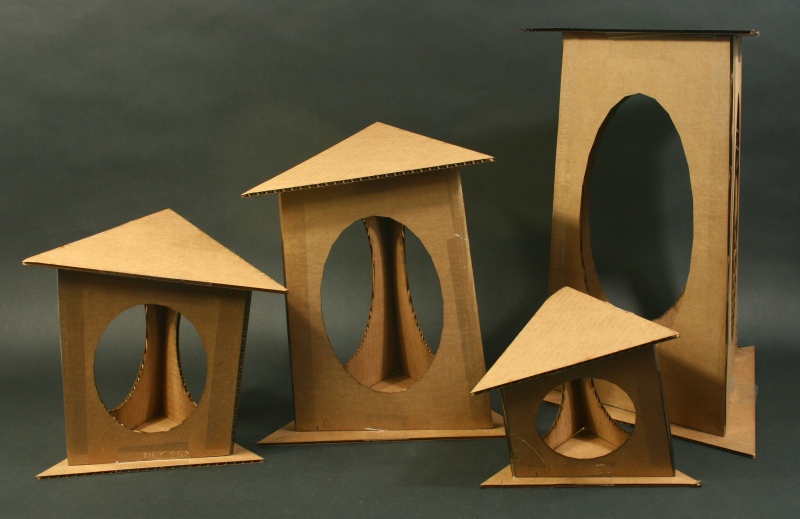
2. There are thirteen modules to be assembled. Divide the
class into groups so that everyone can participate. Hand out
the proper pieces to each group. The parts are labeled with
the same system as for the paper arch. For example, module C
requires five parts: C0, C1, C2, triangle C and triangle D, as shown
above.
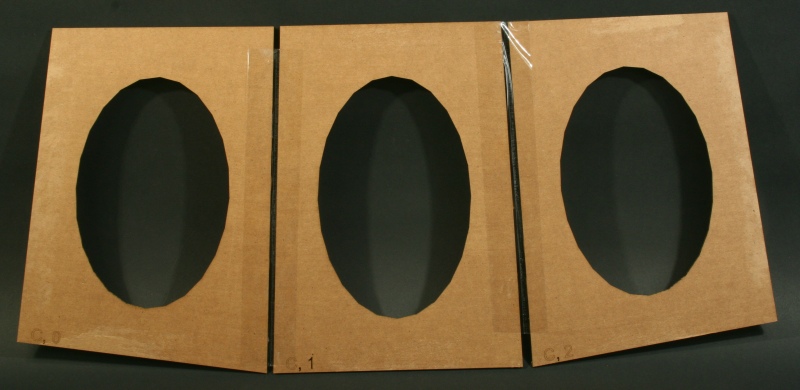
3. Instruct students to tape together their parts 0, 1, and 2 in
that order, with the writing on the lower left of each part.
Leave some space between the parts to allow for folding. Tell
students that rubbing the tape into the cardboard with their
fingernails makes for stronger adhesion.
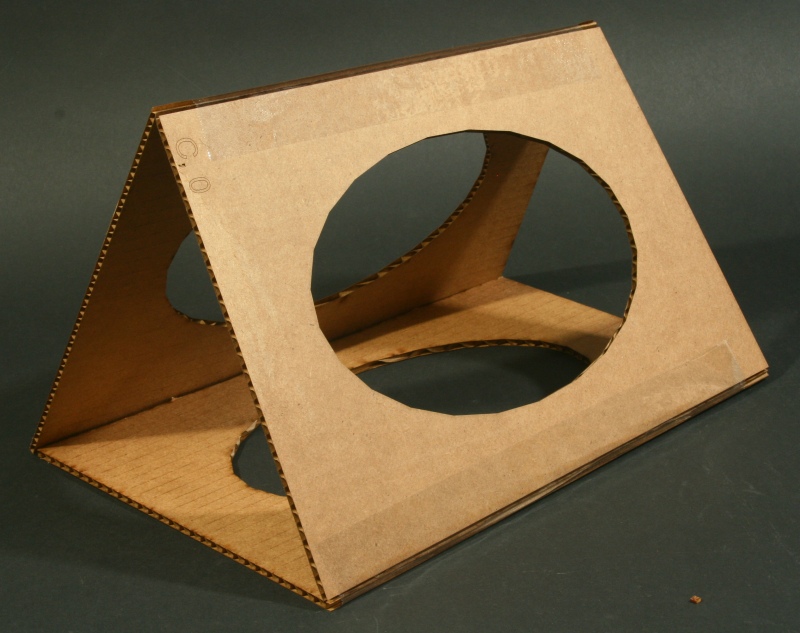
4. Fold the parts into a triangular prism with the writing on the
outside. Tape the third edge.
5. Use tape to attach the triangles to the ends. The larger
triangle goes on the end with the writing.
6. If students have done the paper arch workshop, they will
know what to do without further instruction. Allow them time
to organize themselves and play. If the students are new to
this arch design, guide them in properly lining up the
modules. Remind students that the spacing between the base
pieces is crucial.
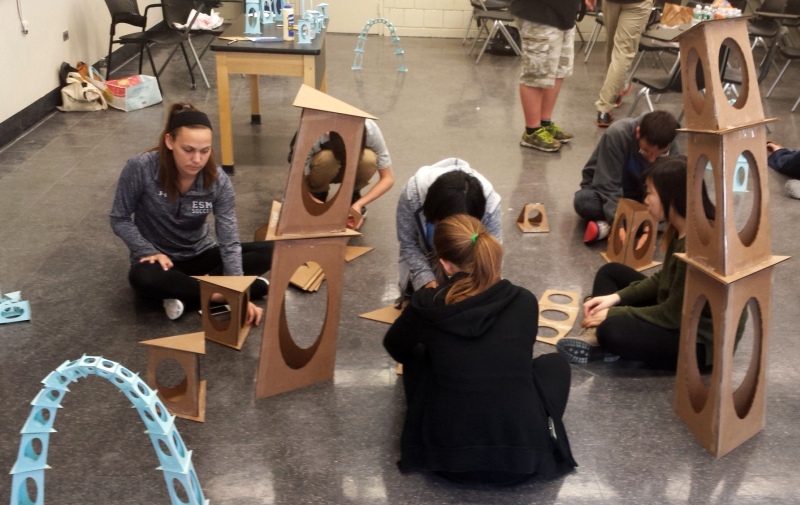
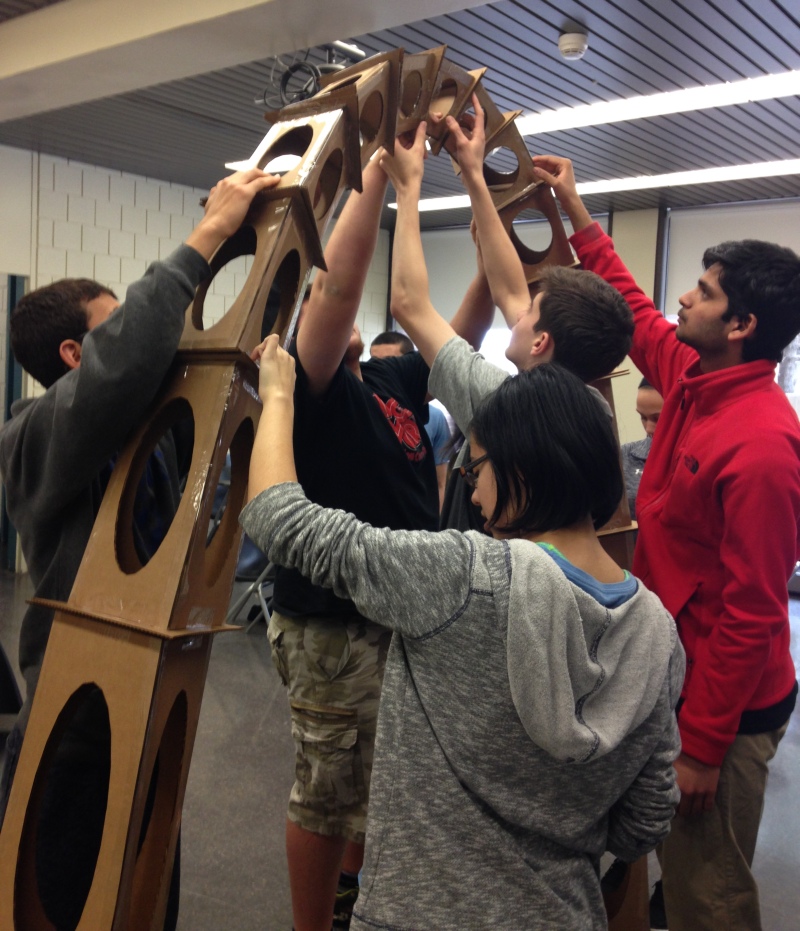
7. Students will work together to balance the pieces for the
exciting result.