Making Math
          Visible

Wiggly Dome


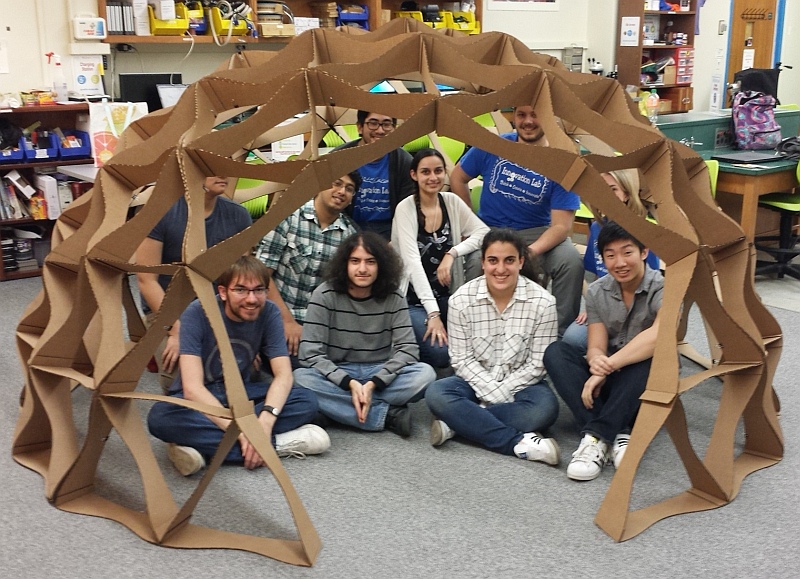
Time Required: 3 hours

Materials:
Notes:

1. The paper dome workshop is an introduction to the mathematics underlying this activity and should be done first as it provides the necessary background.  Save the marked paper icosahedron from that activity to use here.  The cardboard dome workshop is also useful, as it familiarizes students with the gluing technique and the structure of the joints.
2. The template files are designed for a dome ten feet in diameter.  They can be adapted to other sizes, but all parts must be scaled by the same factor.
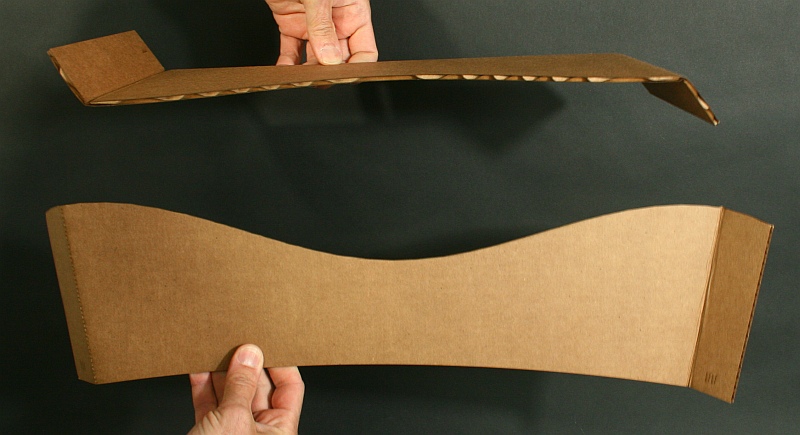
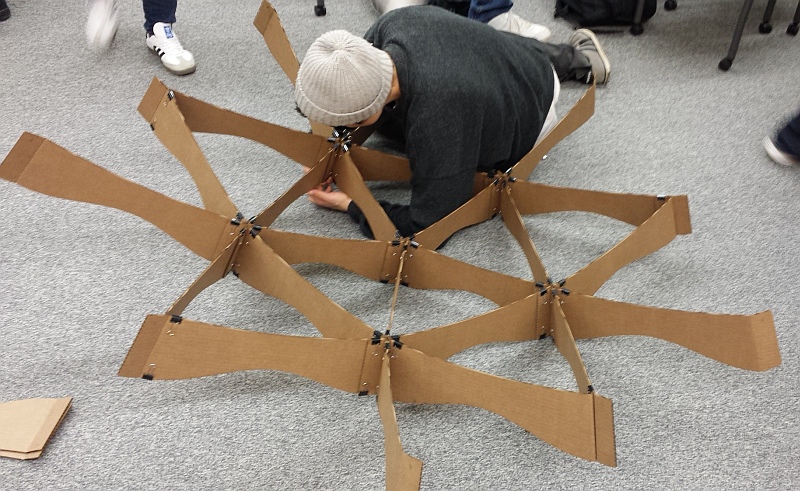
3. The cardboard struts can be cut with a band saw or laser-cutter.  The laser-cutter file includes a dotted line for folding and the part number (a Roman numeral I-IIII that can be read front or back!)  If using a band saw, mark the fold line by hand and write the part number on each piece.

Part A. Minds-On


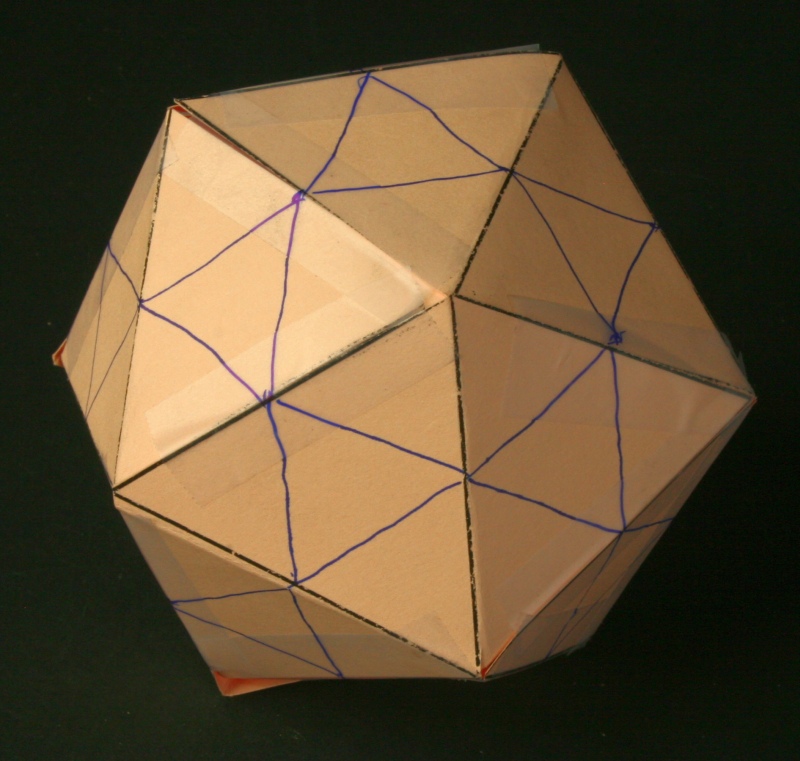
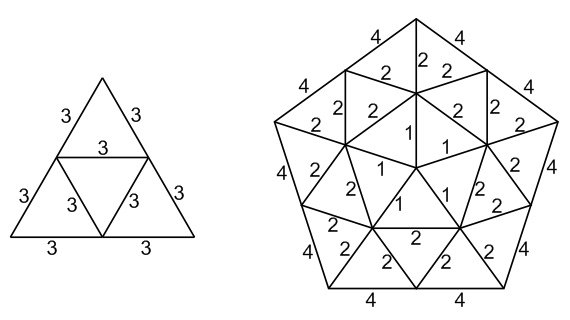
1. Refer back to the paper dome workshop to review the paper icosahedron that was divided into triangles reducing the edge length to half. We called this a "frequency 2 icosahedral structure".


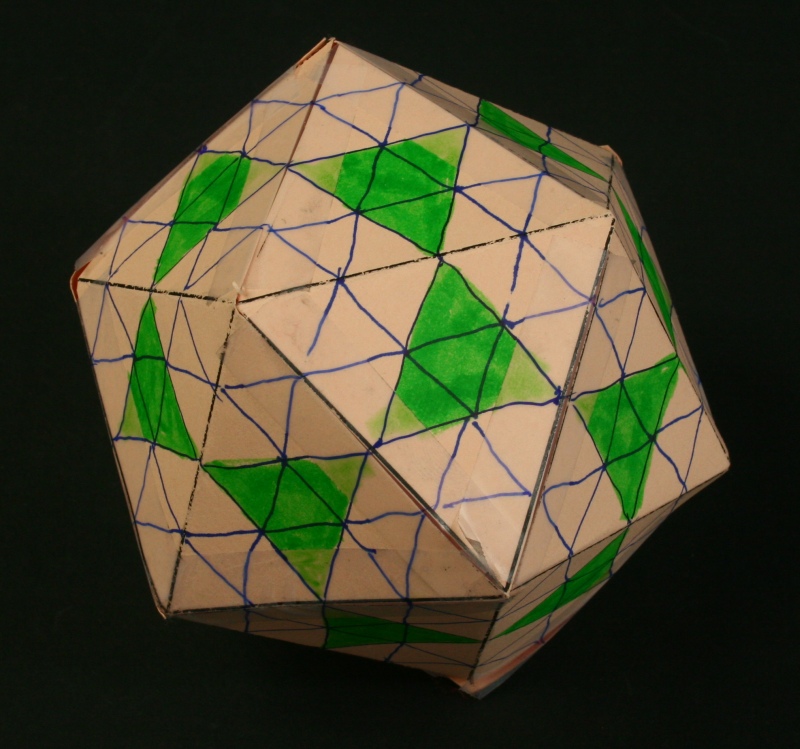
2. Ask students to visualize and create a frequency 4 icosahedral structure by dividing each small triangle edge in half again.  Instruct students to color in the central four small triangles of each icosahedral face as shown above. 


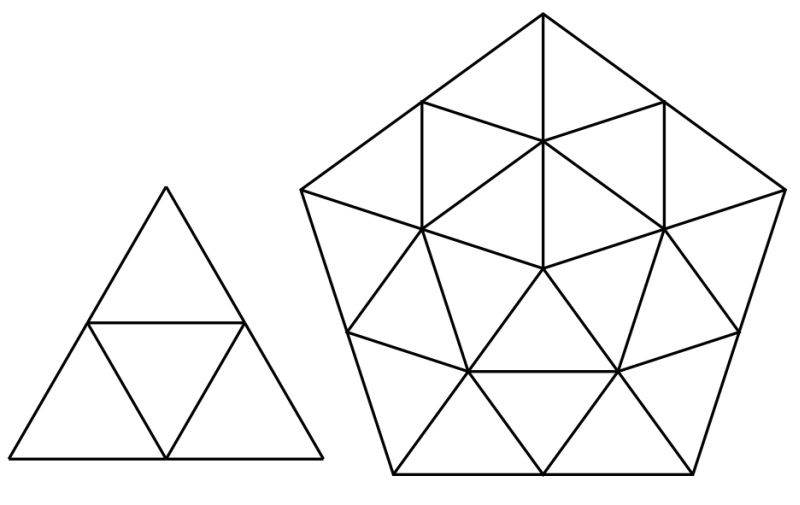
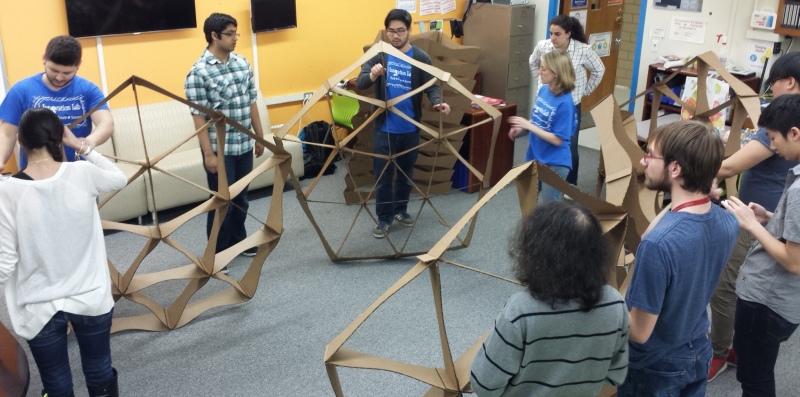
3. Show students the above image or draw it on the board so they understand that the frequency-4 dome can be made from two types of modules: triangles and pentagons. 


4. Ask students to visualize how the icosahedron will be cut in half on an equator to make a hemisphere.  Lead students to determine how many triangle modules and how many pentagon modules are required.  [Answer: 10 triangles and 6 pentagons make the full hemisphere, but we will omit one pentagon to create a doorway.]

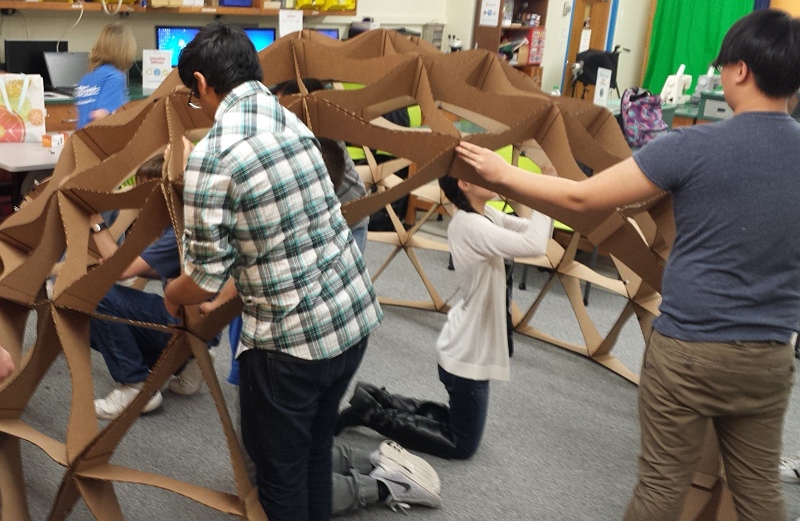
5. Let them imagine that the vertices are adjusted radially so they all lie on a sphere.  As a consequence there will be a variety of strut lengths. The image above depicts strut lengths by color coding.  The calculation of strut lengths is worked into the template above, however this calculation can be performed by students as an extension exercise if they have a trigonometry background. 
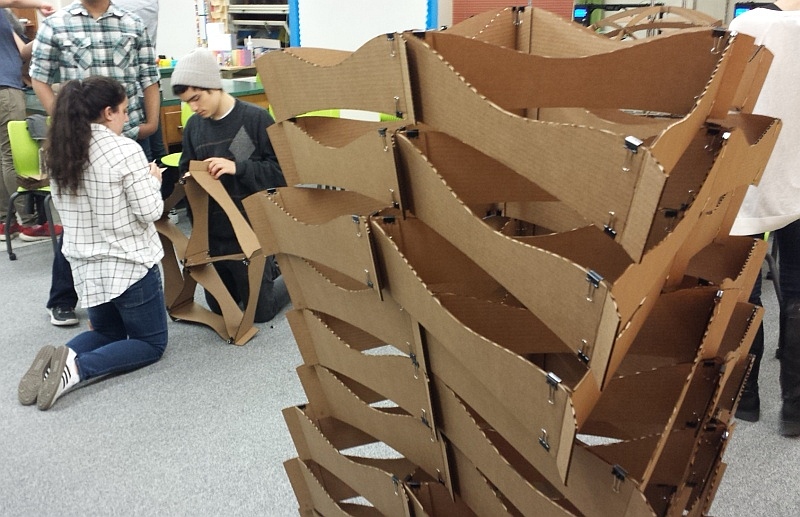

Part B. Hands-On

1. Explain to students that they will construct a frequency-4 icosahedral hemisphere from cardboard struts using the triangle and pentagon modules they observed in their paper model.  The struts are cut with a wiggle along the outer edge to add an aesthetic quality.


2. Ask students to work in groups and clip together ten triangle modules.  Each triangle module uses nine struts of type III.  Remind students to bend the flaps up on the right and down on the left, as shown above.  Remind them also of the cyclic arrangement of flaps around each vertex, shown above. 


3. Hand out small amounts of glue and the glue brushes.  Refer back to the cardboard dome for proper gluing technique: remove one clip at a time, brush glue on the tab, and replace the clip with the handles down to indicate the joint has been glued.  After the glue is dry (up to half an hour), remove the clips.  The image above shows a stack of triangle modules with the glue drying.


4. Show students that the pentagon unit involves three different strut lengths as indicated in the diagram above. 


5. To build each of the five pentagon modules, students should first make a starfish with five struts of type I meeting at the center.  This will be surrounded by triangles made of struts of type II, as shown in the diagram.  The outer ten struts making a double-size pentagon are of type IIII.  It should first be built with clips so you can double-check the lengths before gluing the tabs.  (The image above shows the five central struts of type I surrounded by the struts of type II, before the outer struts of type IIII have been added.)


6. Once the five pentagons have been built, students can clip the modules together to build the complete dome.  Remember to leave out a pentagon for the doorway. Refer back to the colored paper model to ensure students understand that pentagons always join to triangles, and triangles always join to pentagons.


7. You now have the option of gluing the modules together to make a permanent dome.  If you would like the dome to be transportable, we recommend leaving it clipped together so it can be disassembled and moved.  All the individual modules can fit through a doorway.

Part C. Conclusion

Now that students are familiar with the structure of domes, discuss design ideas for creating a dome of their own.  Include structure, choice of materials, frequency, size, and aesthetic variations to explore possibilities.


Possible Extensions

1. Work out how to calculate the lengths of the individual struts.  (Look up "chord factors for geodesic domes.")

2. Create your own dome from the material of your choice.