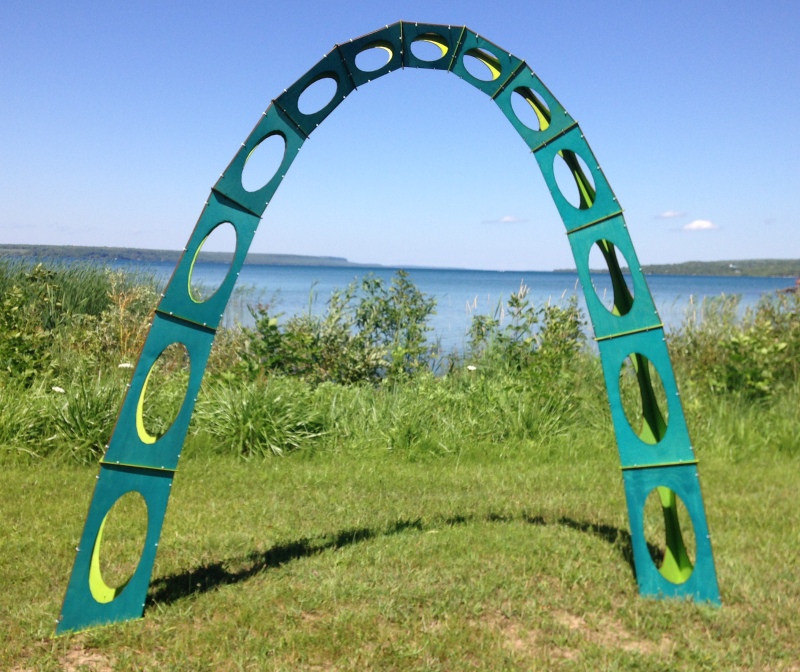
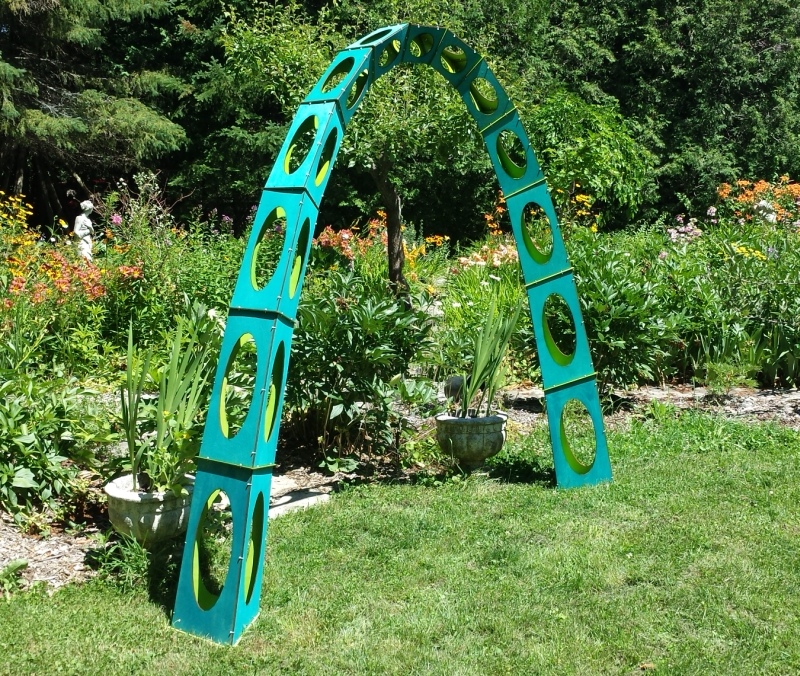
Wooden Catenary Arch
This seven-foot tall wooden catenary arch is a sculptural object and
mathematical conversation piece that can be displayed in the
classroom or the school. It provides a wonderful culminating
activity after students have constructed and experienced the paper catenary arch or the cardboard catenary arch. It
is appropriate for students at the middle- and high-school levels,
however connecting the cable ties may be too challenging for younger
students. Everyone will enjoy having this beautiful sculptural
creation in their classroom and will want to explain the concepts to
others.
We recommend first doing the paper
catenary arch in order to give students a detailed
understanding of the structure and the assembly process. After
that, relatively little instruction is needed for this wood
version.
If you want to try this workshop with younger students, we suggest
that you prepare ahead of time by first doing the paper catenary
workshop yourself, both to internalize the details and to have a
finished paper version for students to play with. Once
students are familiar with how the paper catenary modules go
together, they will understand the structure to be made in
wood. Younger students will be able to position the pieces
properly, but you may need to help them insert the cable ties.
Time Required for Assembly: 1 to 1.5 Hours
Materials:
- A model of the paper catenary arch to play with
- 3 mm (1/8 inch) thick plywood, cut using this template. Two of each
triangle (A-G) are required, two each of parts A0, A1, A2, B0,
B1, B2, C0, C1, C2, D0, D1, D2, E0, E1, E2, F0, F1, F2, and one
each of parts G0, G1, G2.
- 300 four-inch cable ties
- wire clippers
- optional wood stain (e.g., ColorCraft
Brusho)
Notes:
1. This is the third of a series of three
catenary arch workshops. If you want to create a
three-part lesson, use the Minds-On and Conclusion
from the paper arch workshop.
2. The parts can be sawed or laser-cut ahead of time by the
teacher or by students in a shop environment. The template is scaled
so that the larger parts just fit on a 12-by-24 inch sheet of
wood. If using a laser-cutter, you will want to arrange the
parts to pack well on your laser-cutter bed. If sawing, use a drill
to make the cable-tie holes.
3. For safety, the completed arch needs to be affixed to a base, a
wall, or the ceiling, so it can not fall over.
Detailed Instructions
1. If students haven't made their own catenary arch, let them play
with the paper modules you made. Explain that the wood arch
has the same 13-part triangular structure, but is different in that
the modules are joined together without the doubled triangles.
They will be making a display object, not a balancing puzzle.
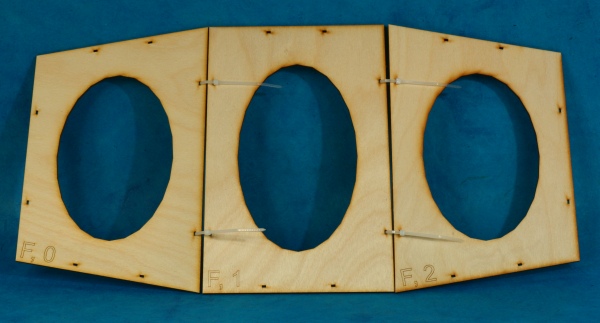
2. There are thirteen modules to be assembled. Divide the
class into groups so that everyone can participate. Hand out
the proper pieces to each group. The parts are labeled with
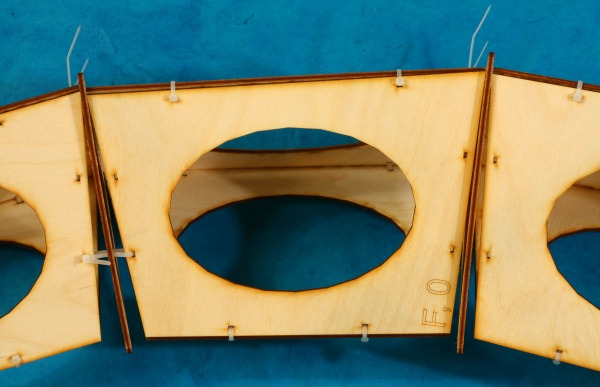
the same system as for the paper arch. Here, module F requires
three parts: F0, F1, and F2, as shown above. (The triangles
will be added later.) Instruct students to use cable ties to
connect their parts 0, 1, and 2 in that order, with the writing on
the lower left of each part. Leave the cable ties loose
initially to allow for flexing.
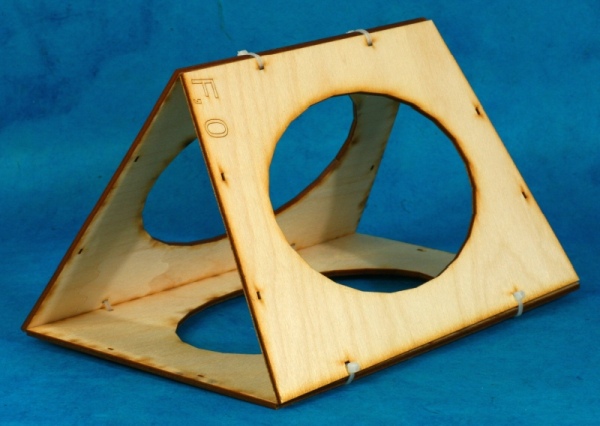
3. Flex the parts into a triangular prism module with the writing on
the outside. Use cable ties to join the third edge.
Tighten all the cable ties and clip their tails.
4. For the A modules only, you can attach the A triangle under it as
a base. Weaving the ties through all the holes is a little
tricky and requires patience. Encourage your students to take
their time and not get frustrated.
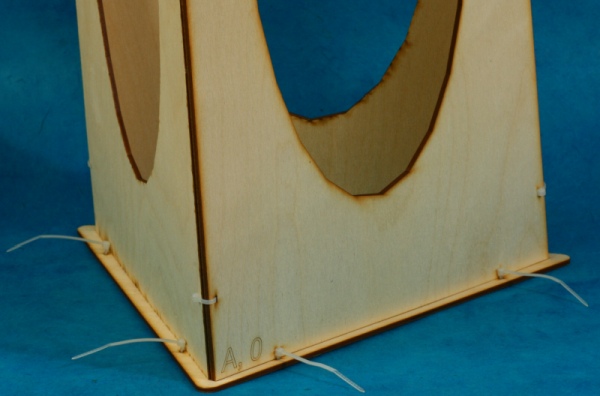
5. Make sure students understand that wherever two modules
come together, there is a single triangle piece in between.
Each cable tie has to go through four holes to connect the
pieces. Students will come up with their own method and
sequence for building the arch. Consider laying out all the
pieces in order on the floor.
6. An option is to stain the parts. Here, they are blue
on the exterior and green on the interior.
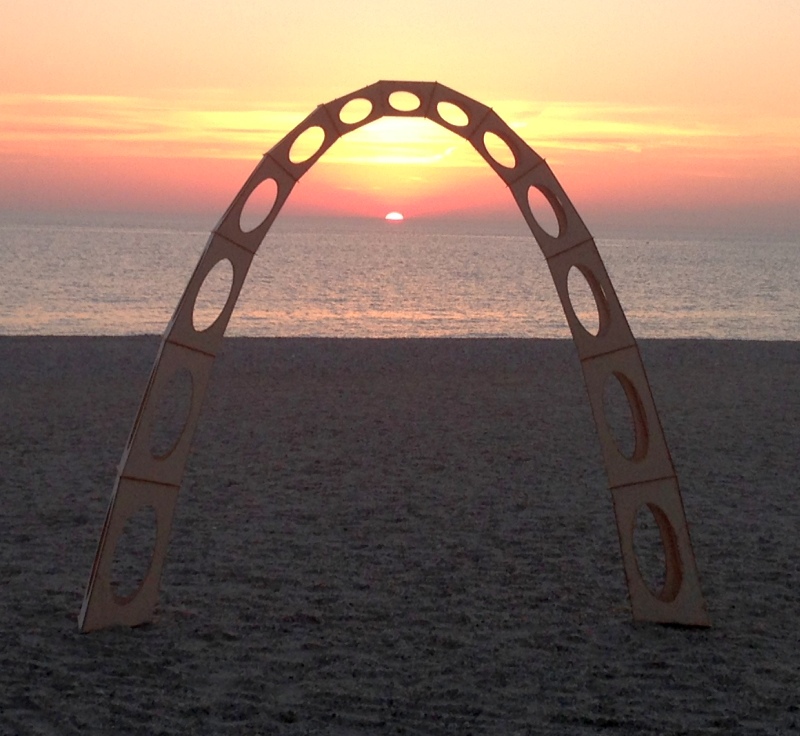
7. When finished, you can stand it up and affix it to a base, a
wall, or the ceiling. Or take it to the beach...